How to make a CARTOON SHADER with a ' double rendered outline ' similar to Disney

first of all that this is a bit ’ hacky ', or is more to get started

the method is based on

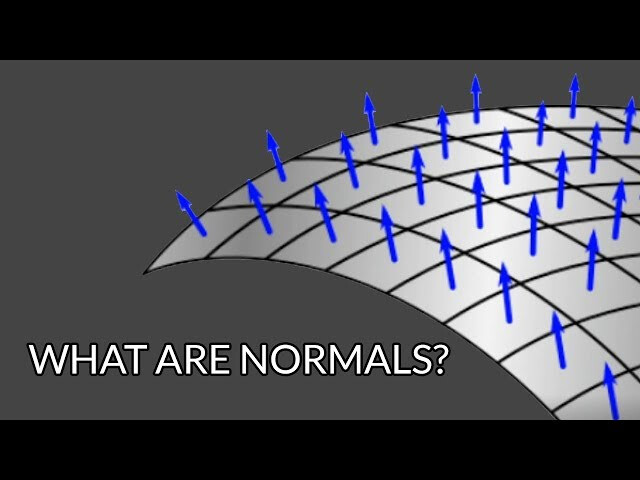
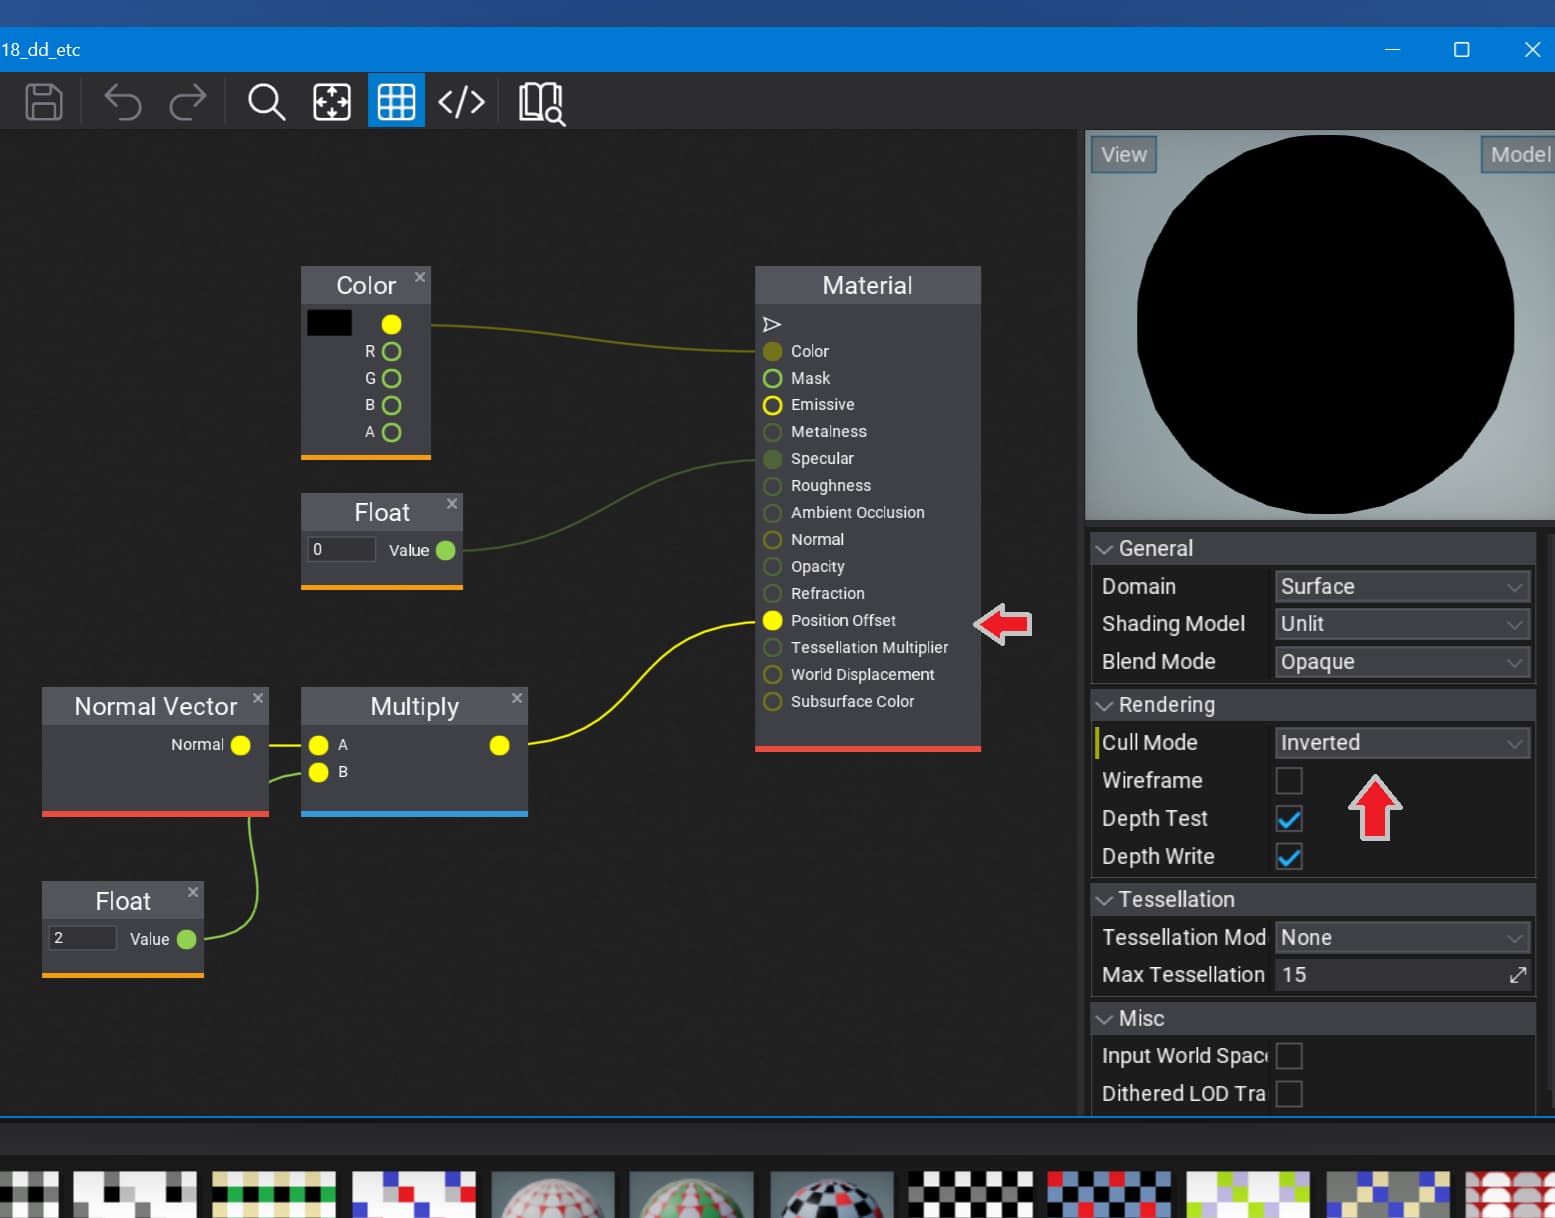
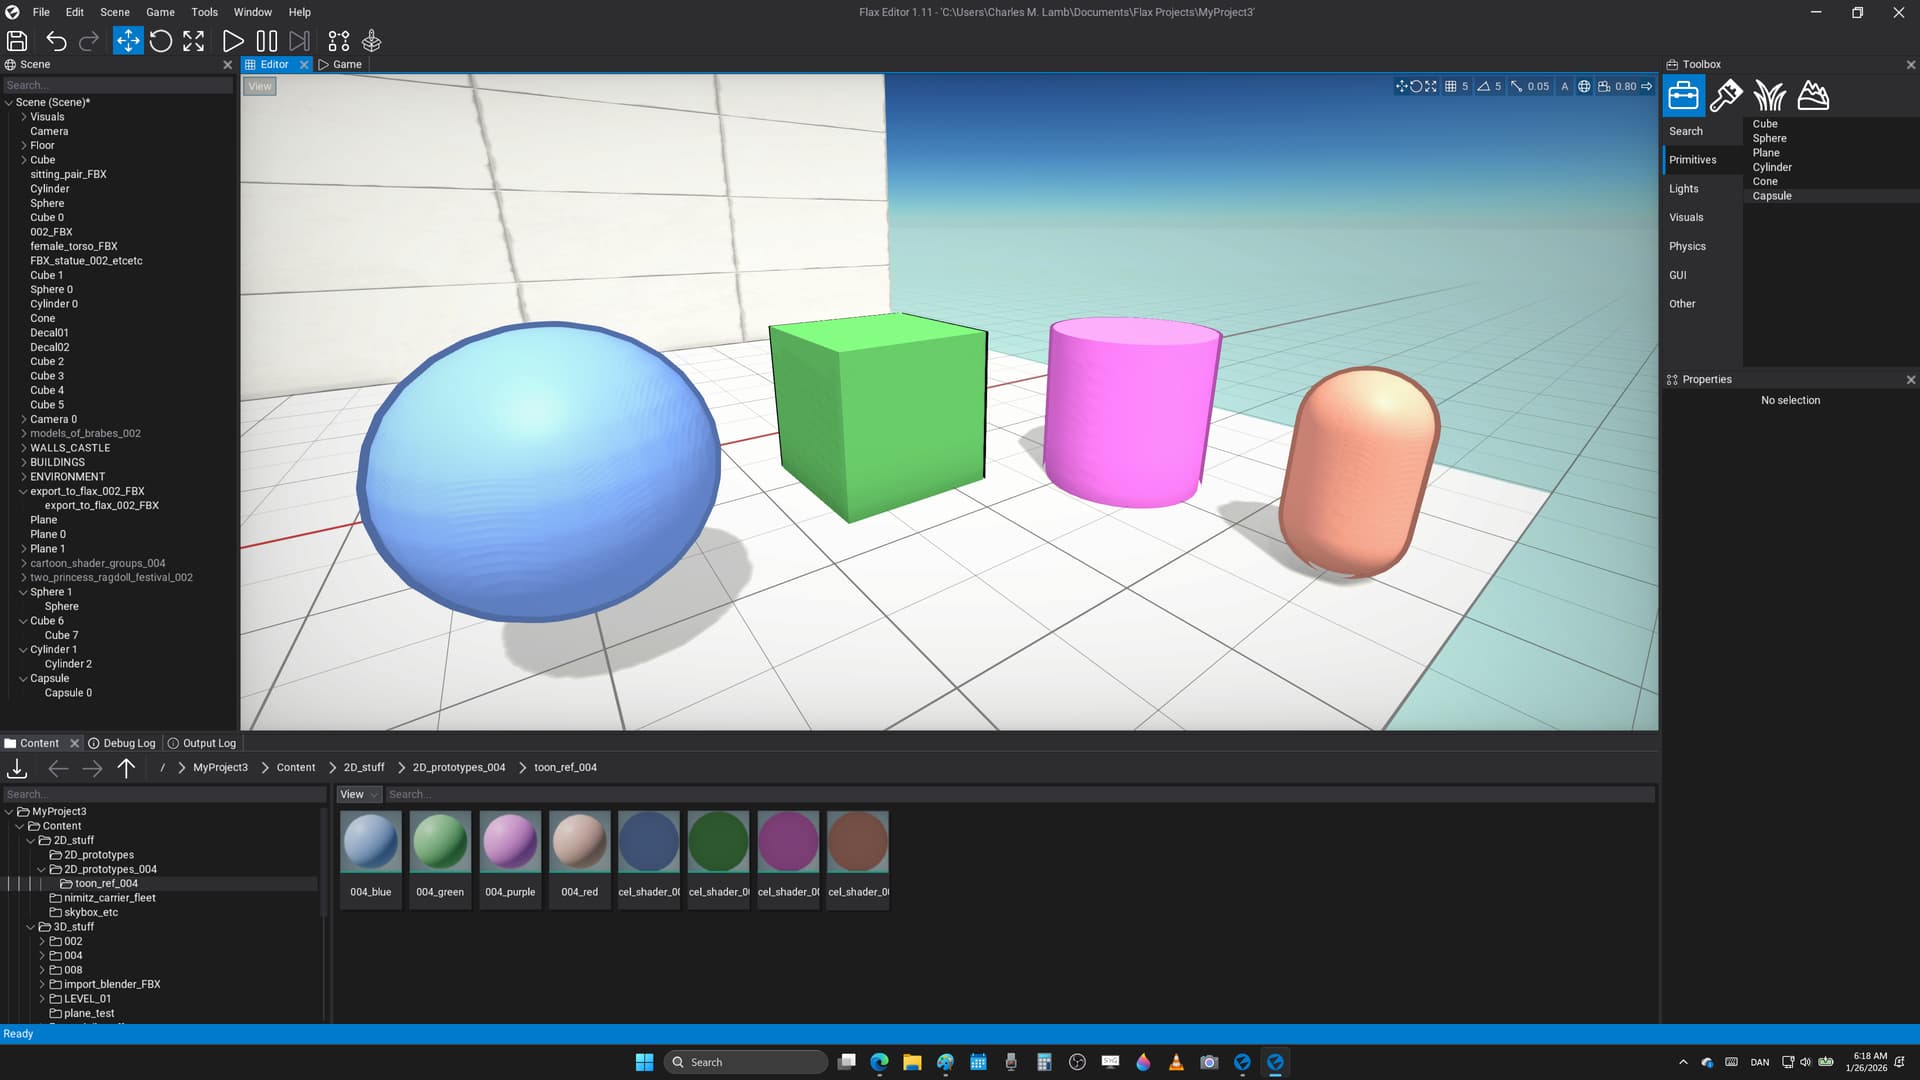
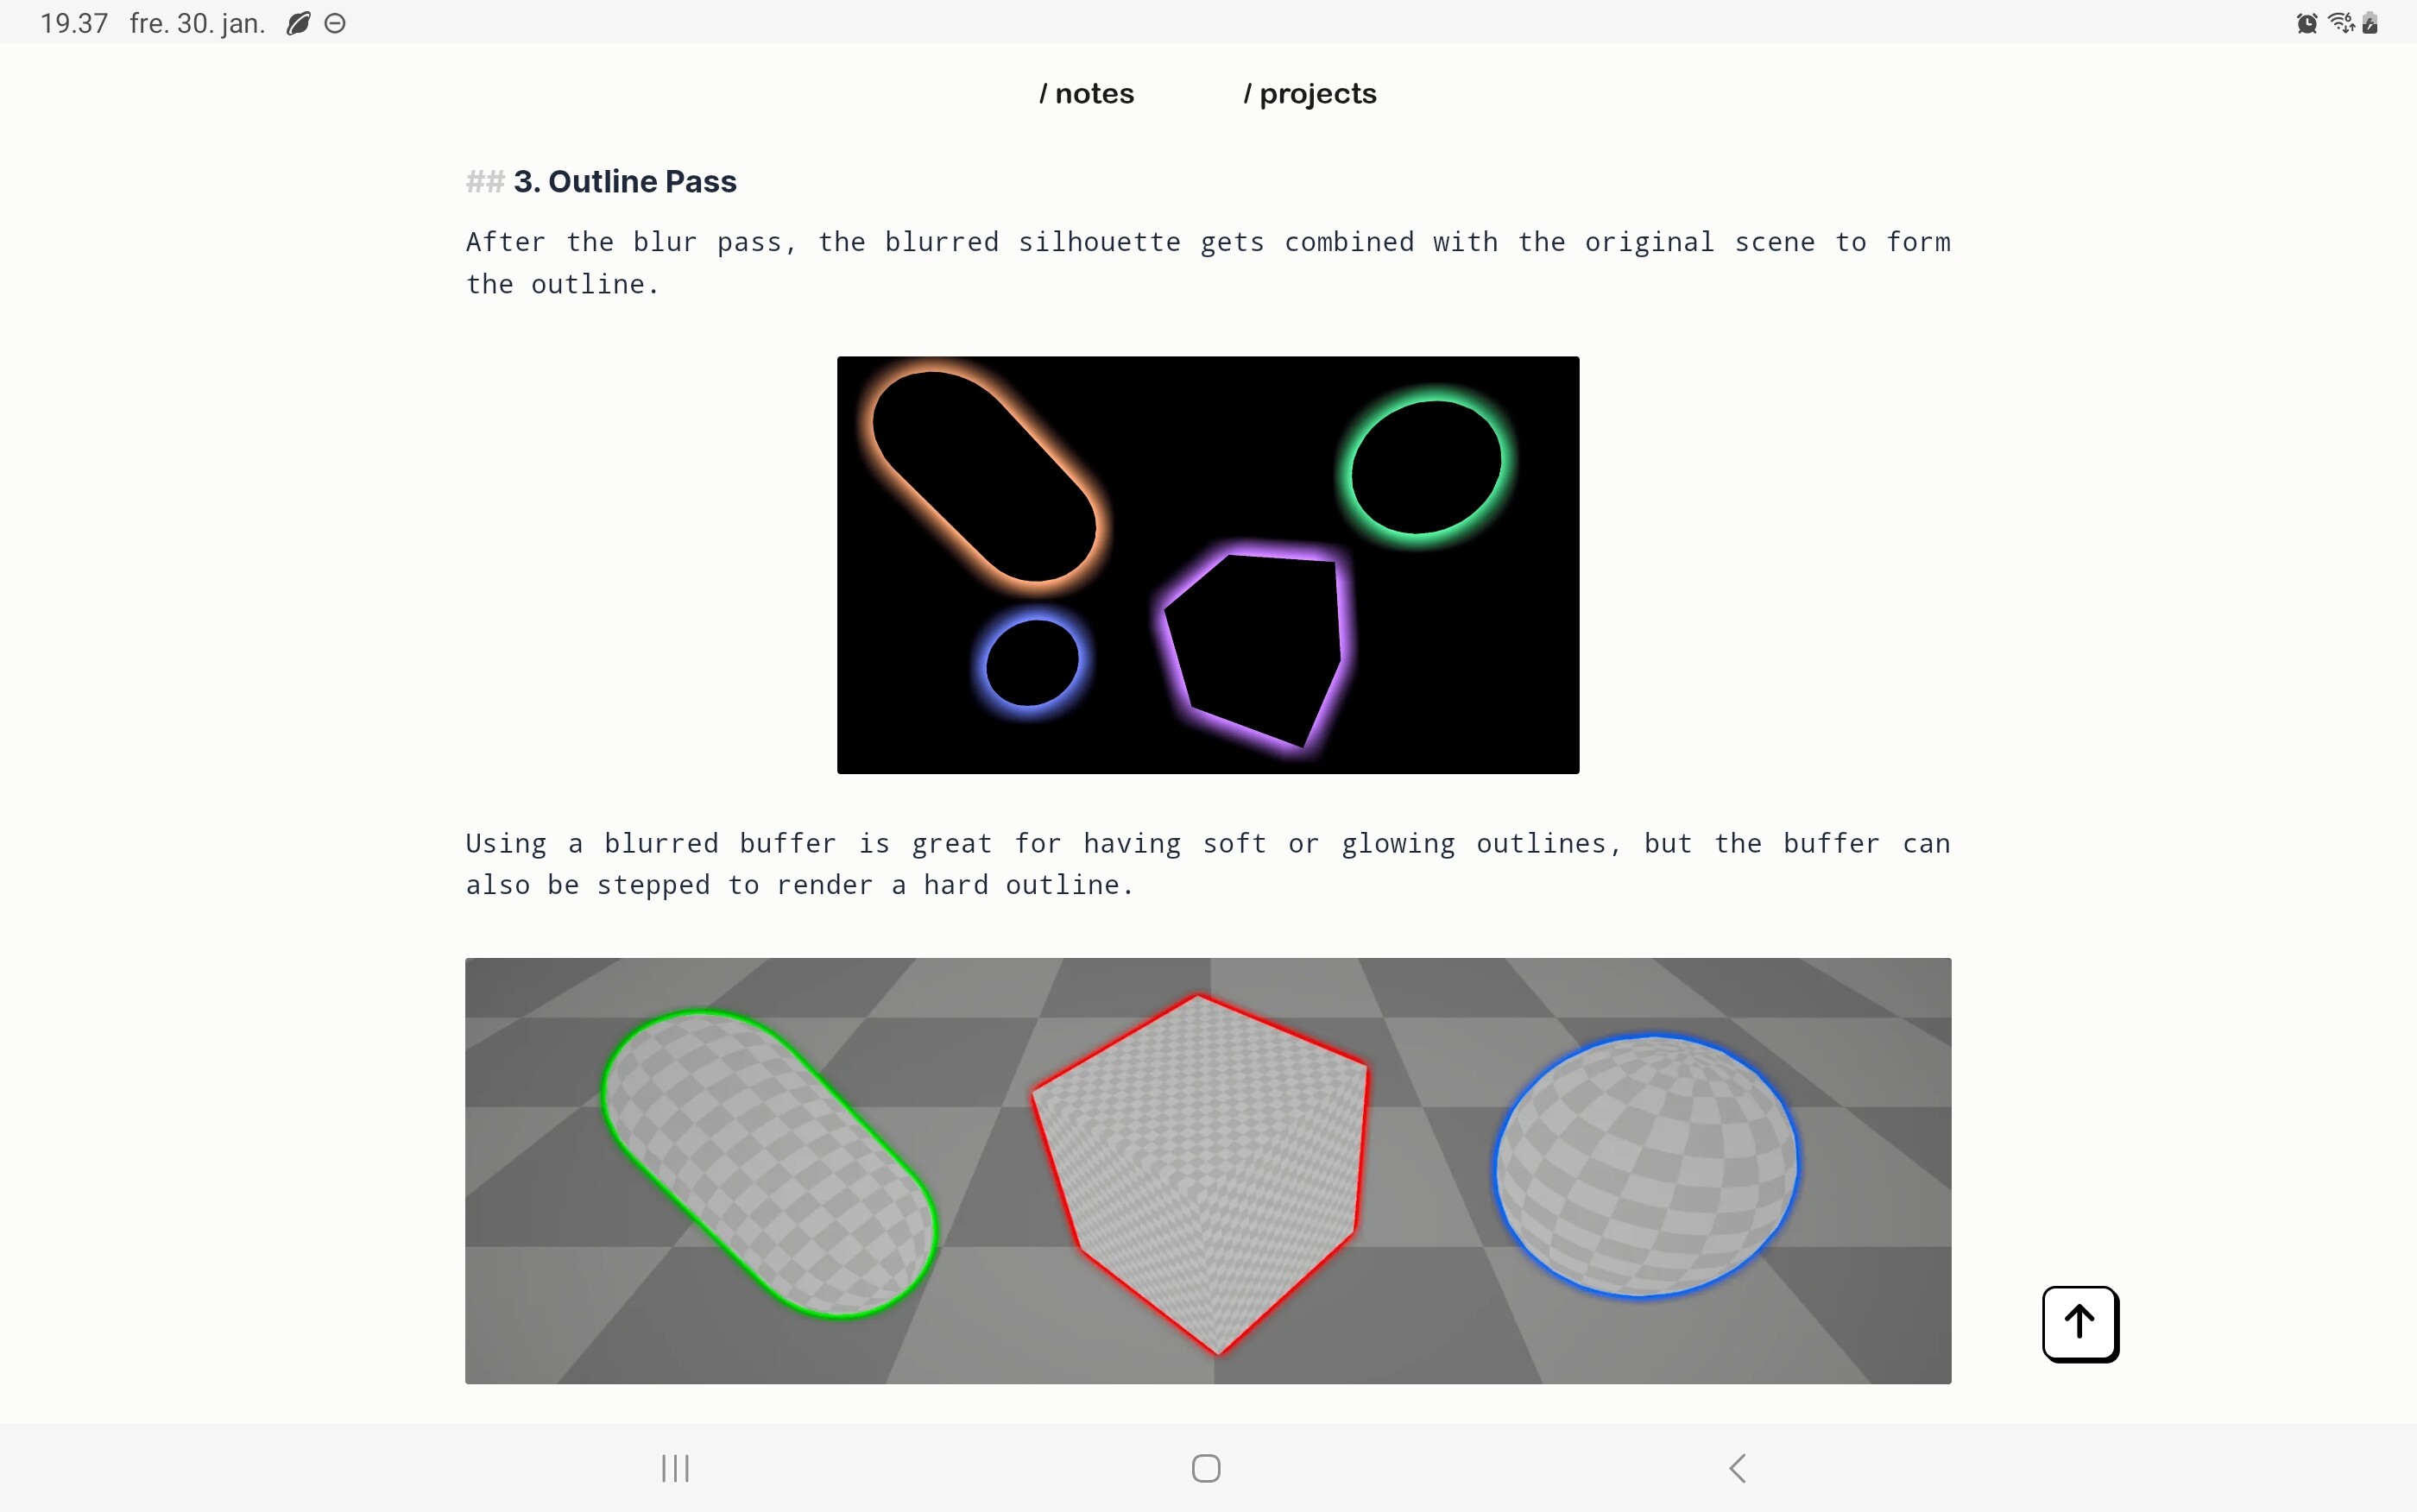
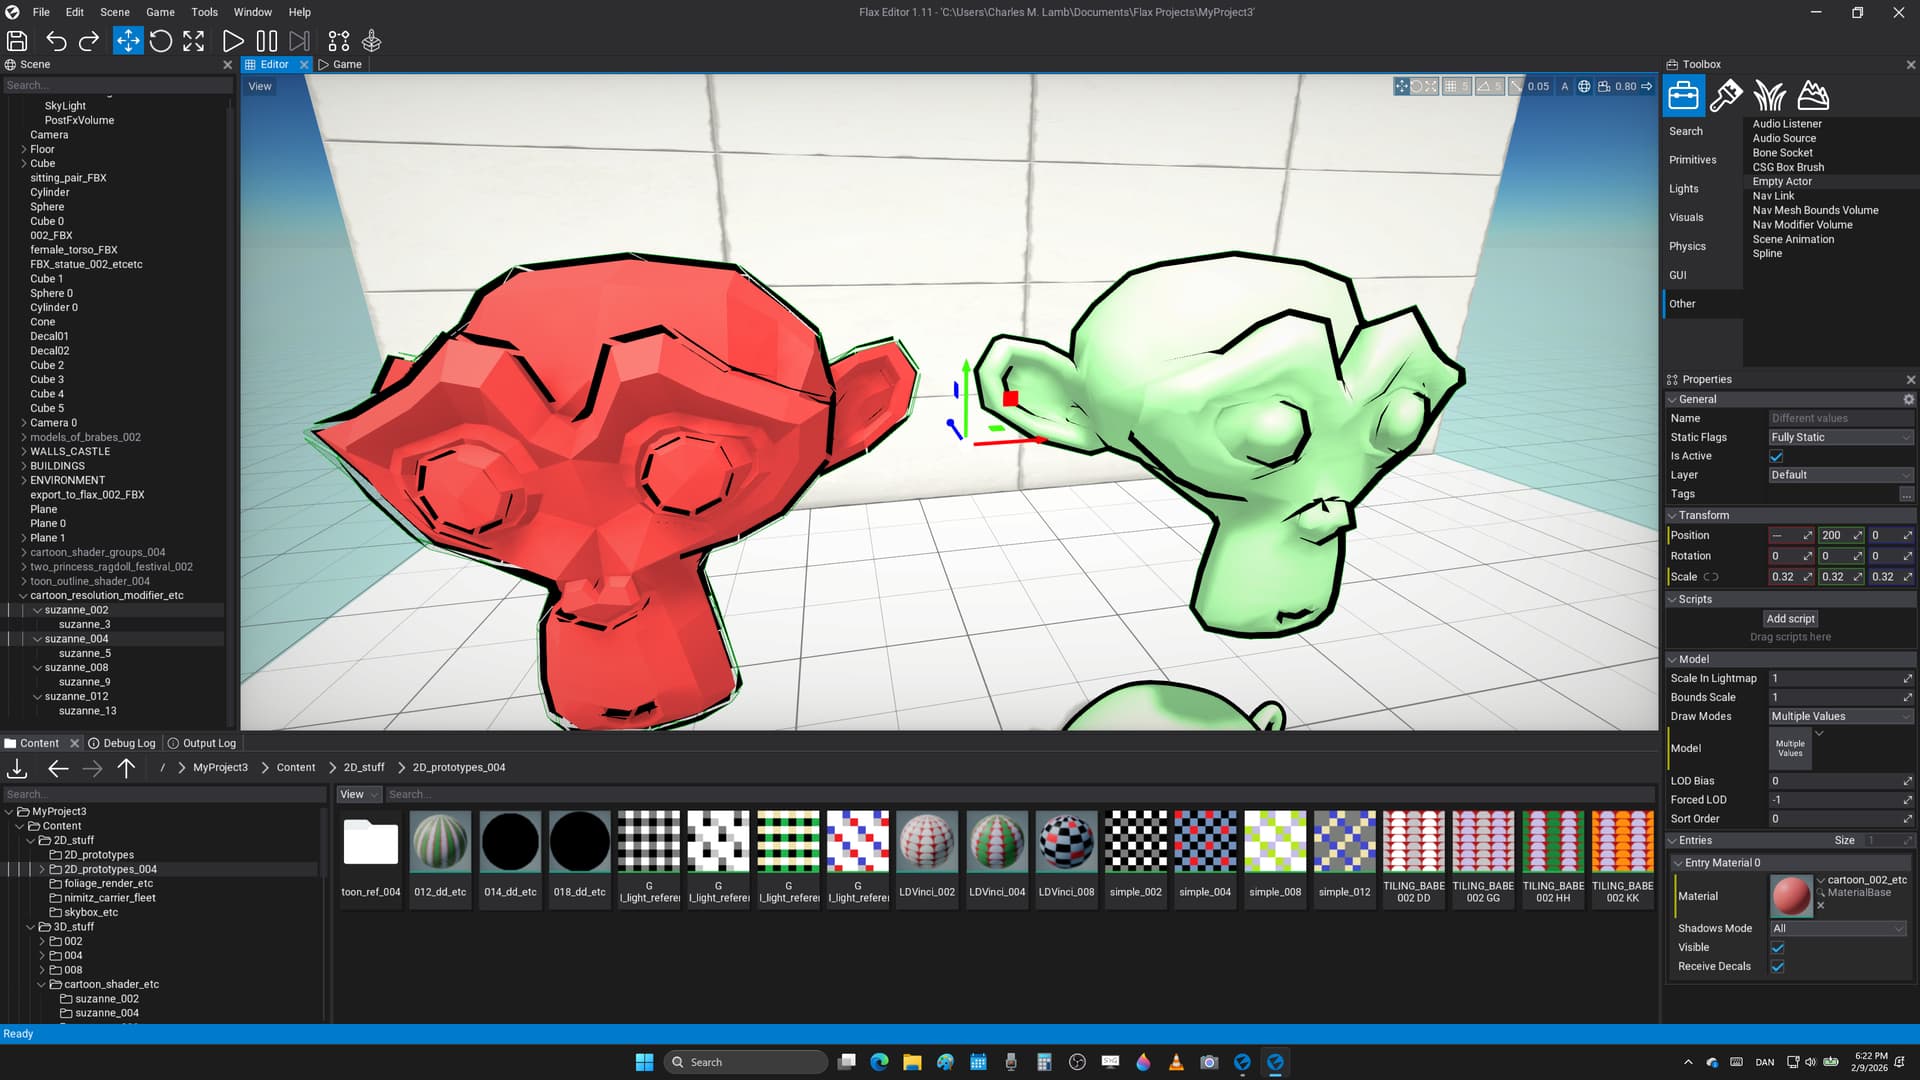
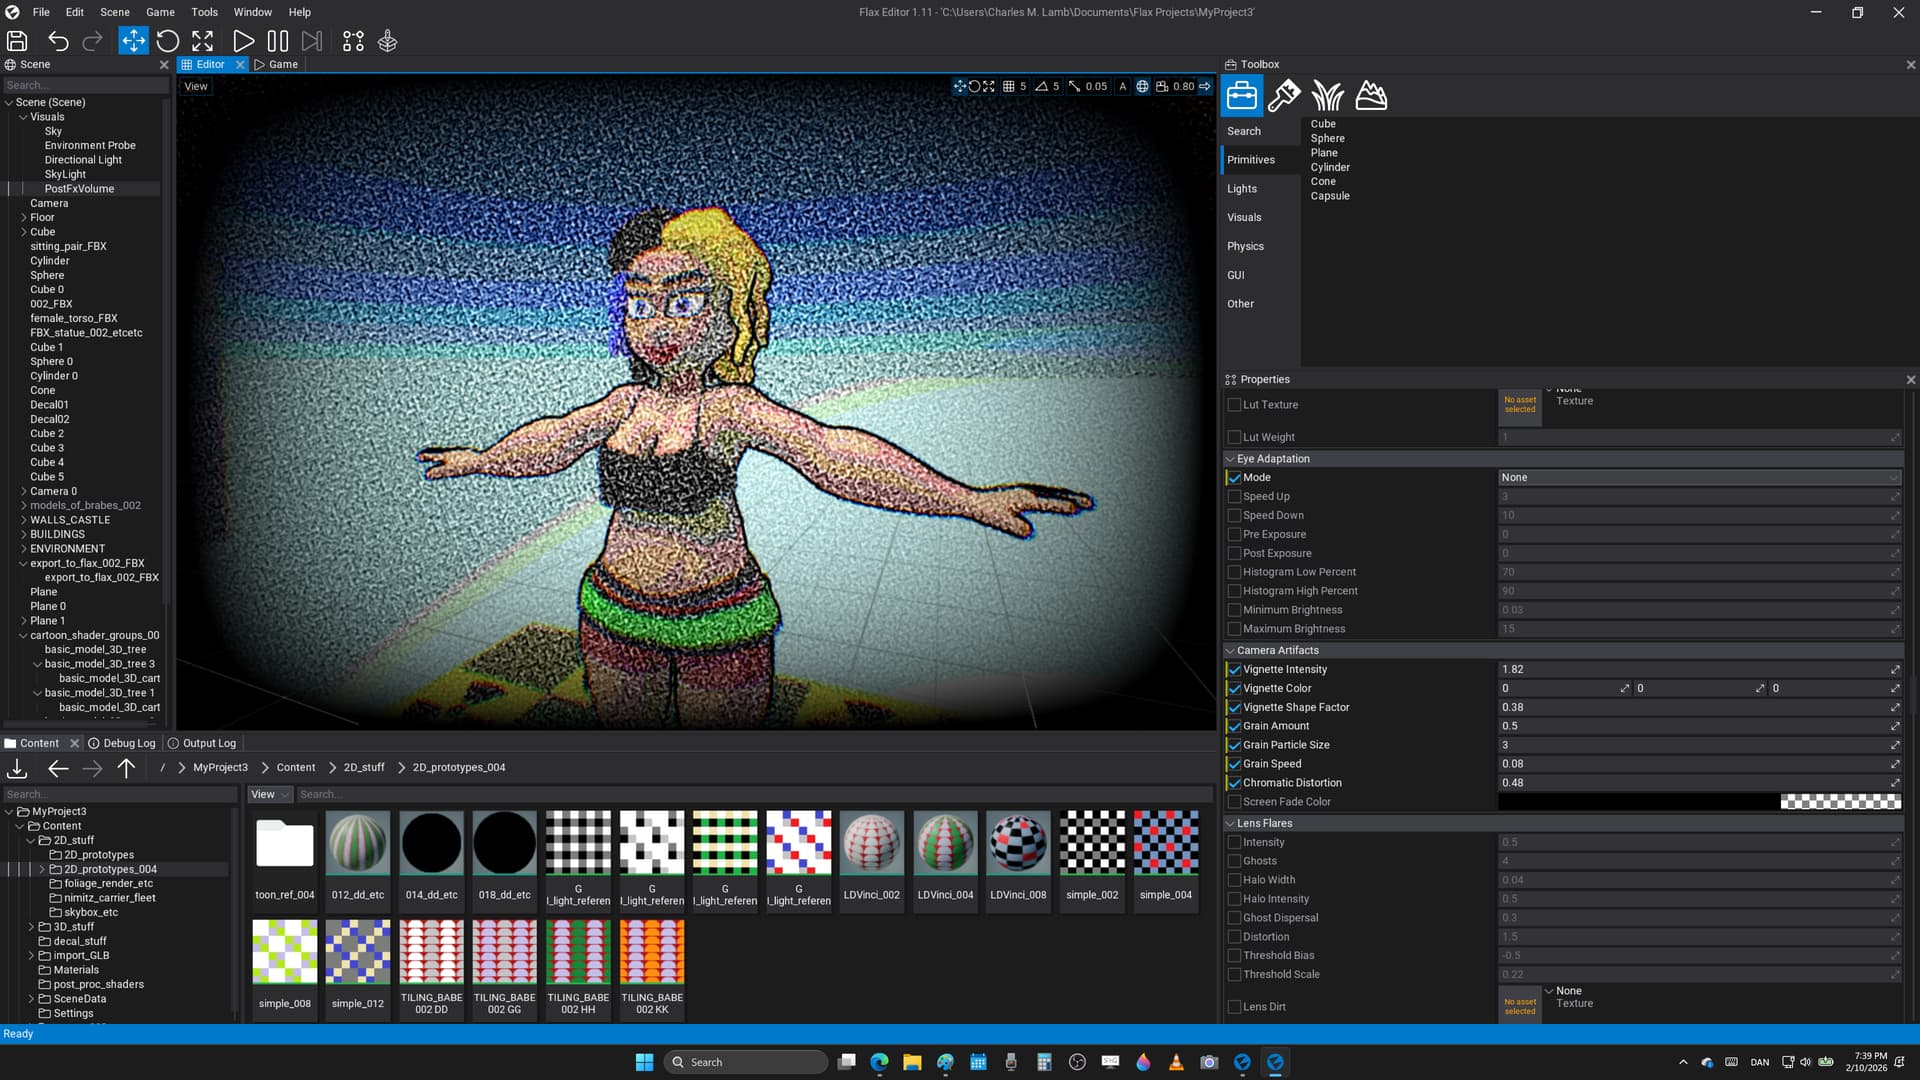
  1. drawing the same mesh twice with reversed culling to create a ’ 3D shell outline ’ that looks nice from most angles, or on most geometry

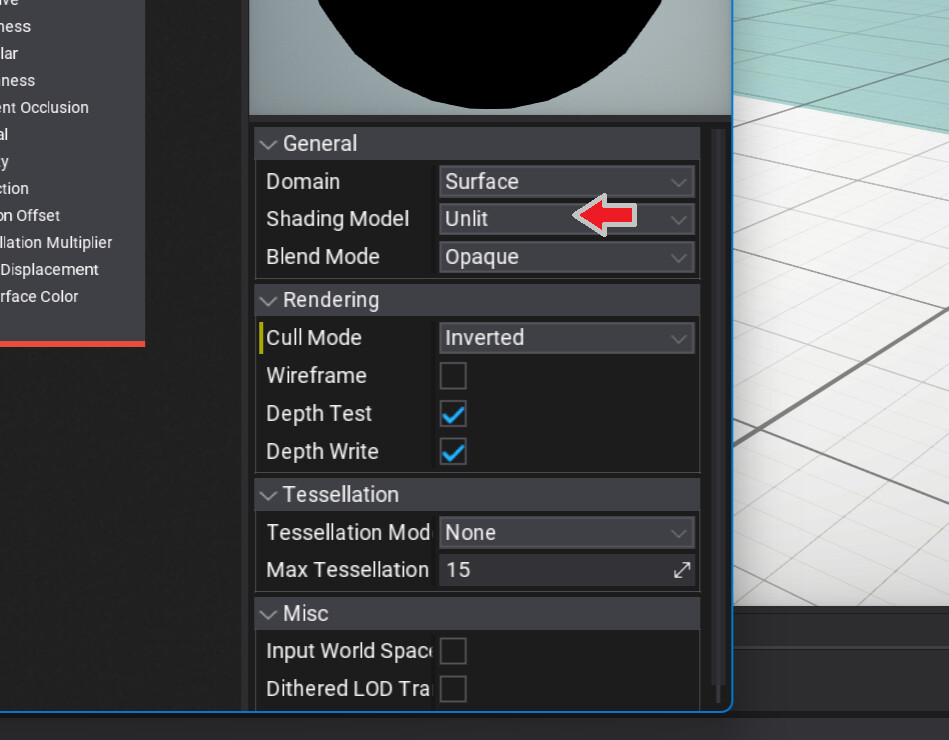
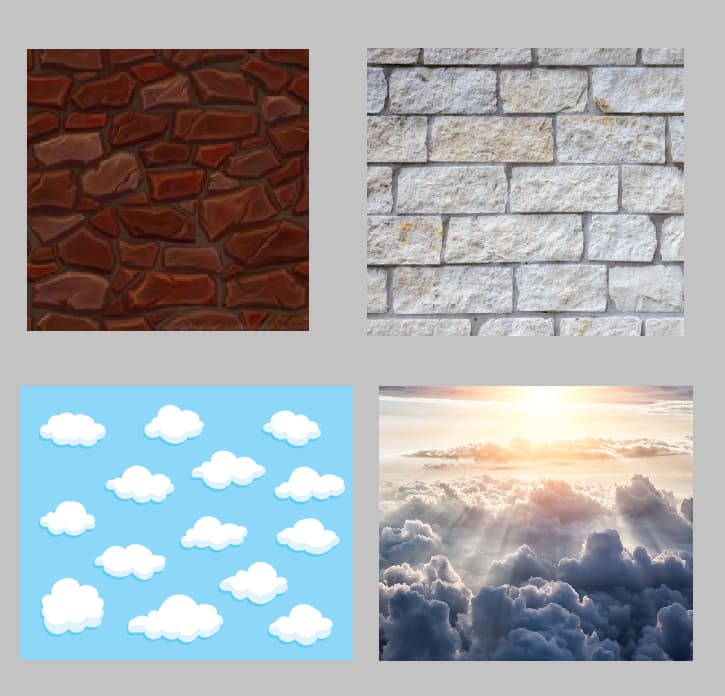
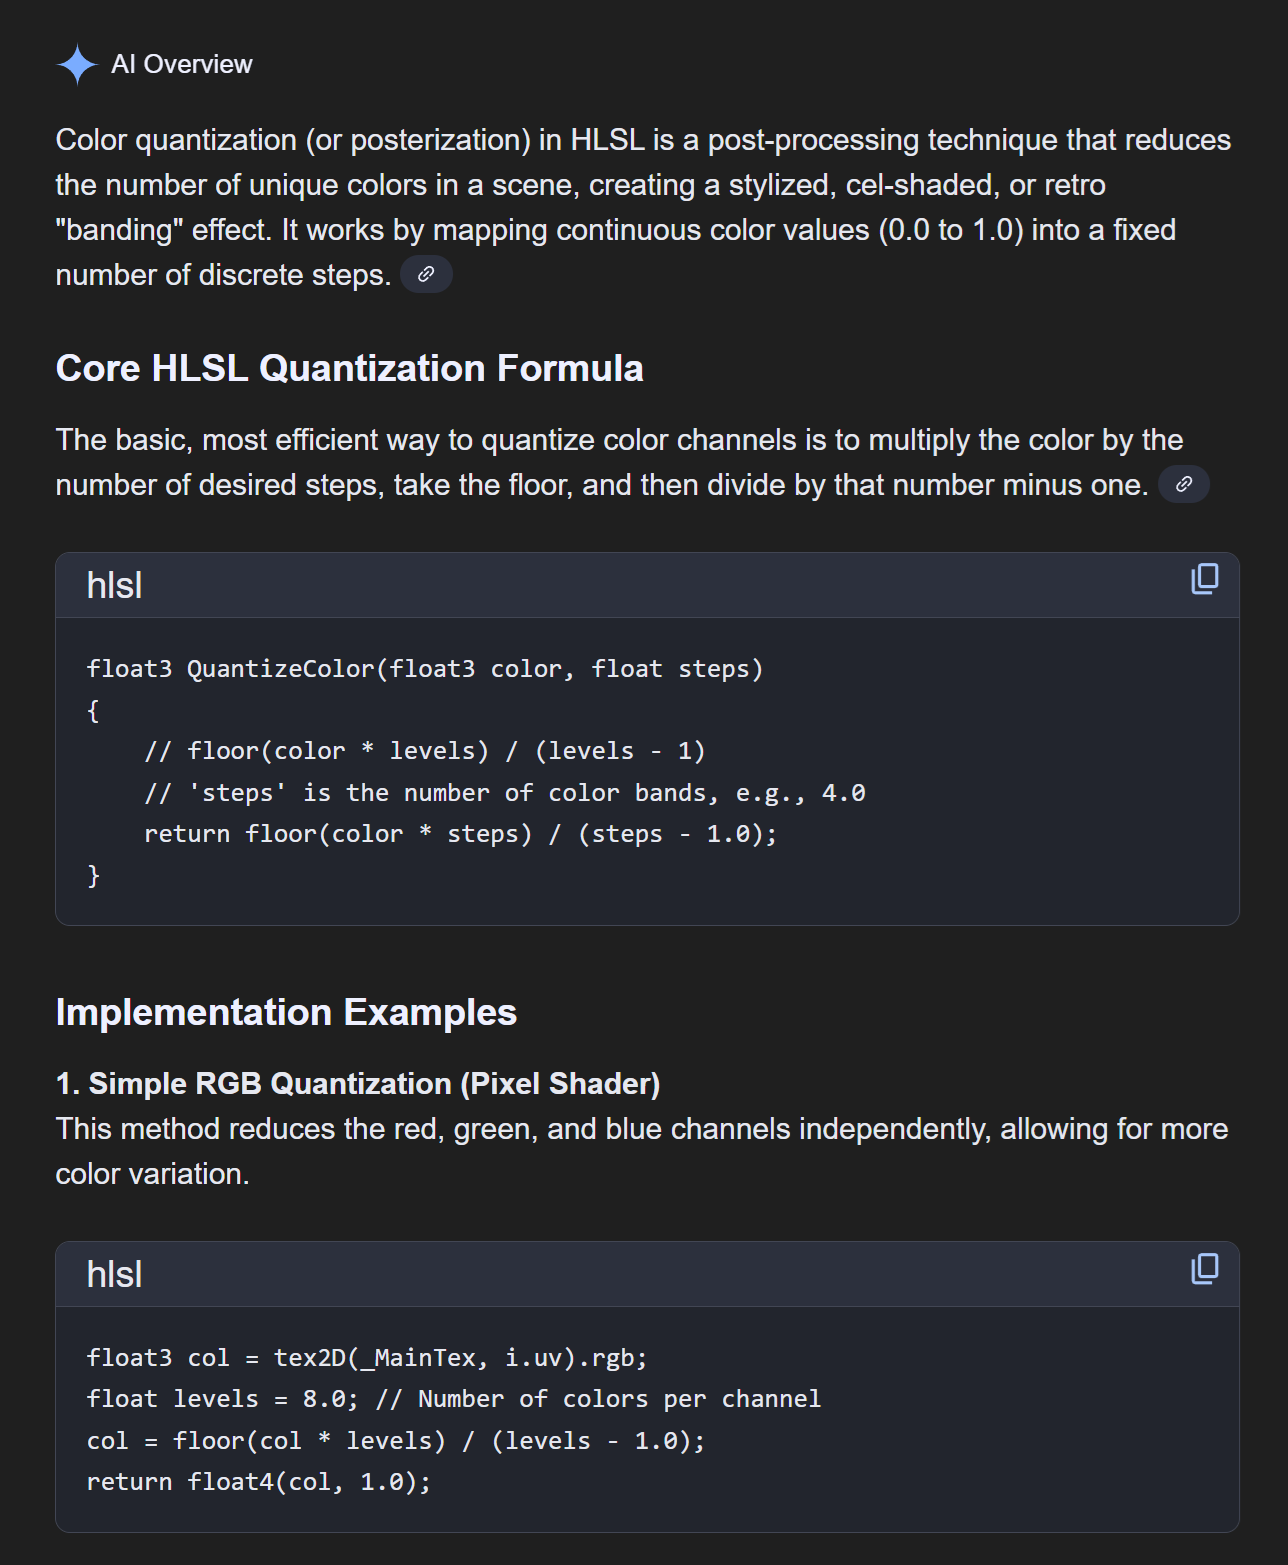
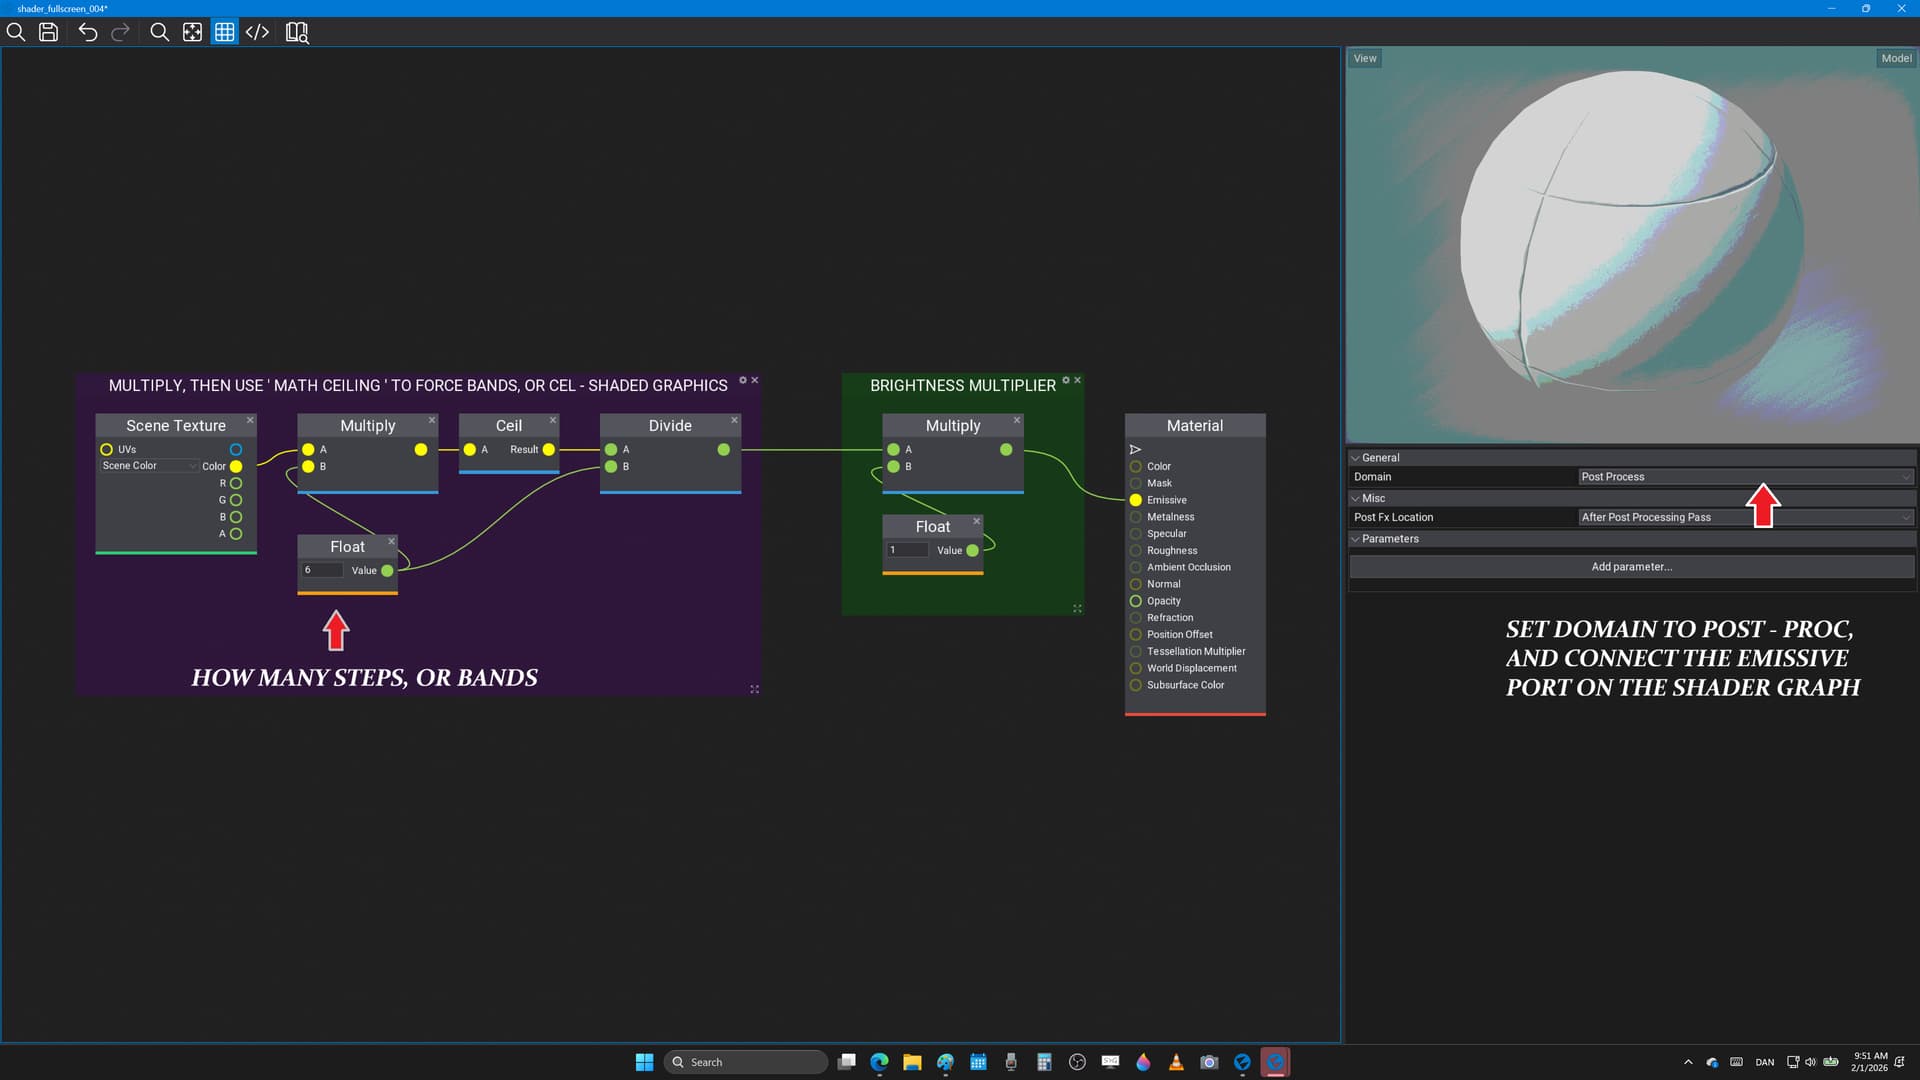
  2. then that the technique requires people to use toon - quality textures, or that it doesn’t add quantization at least to get started on the colors

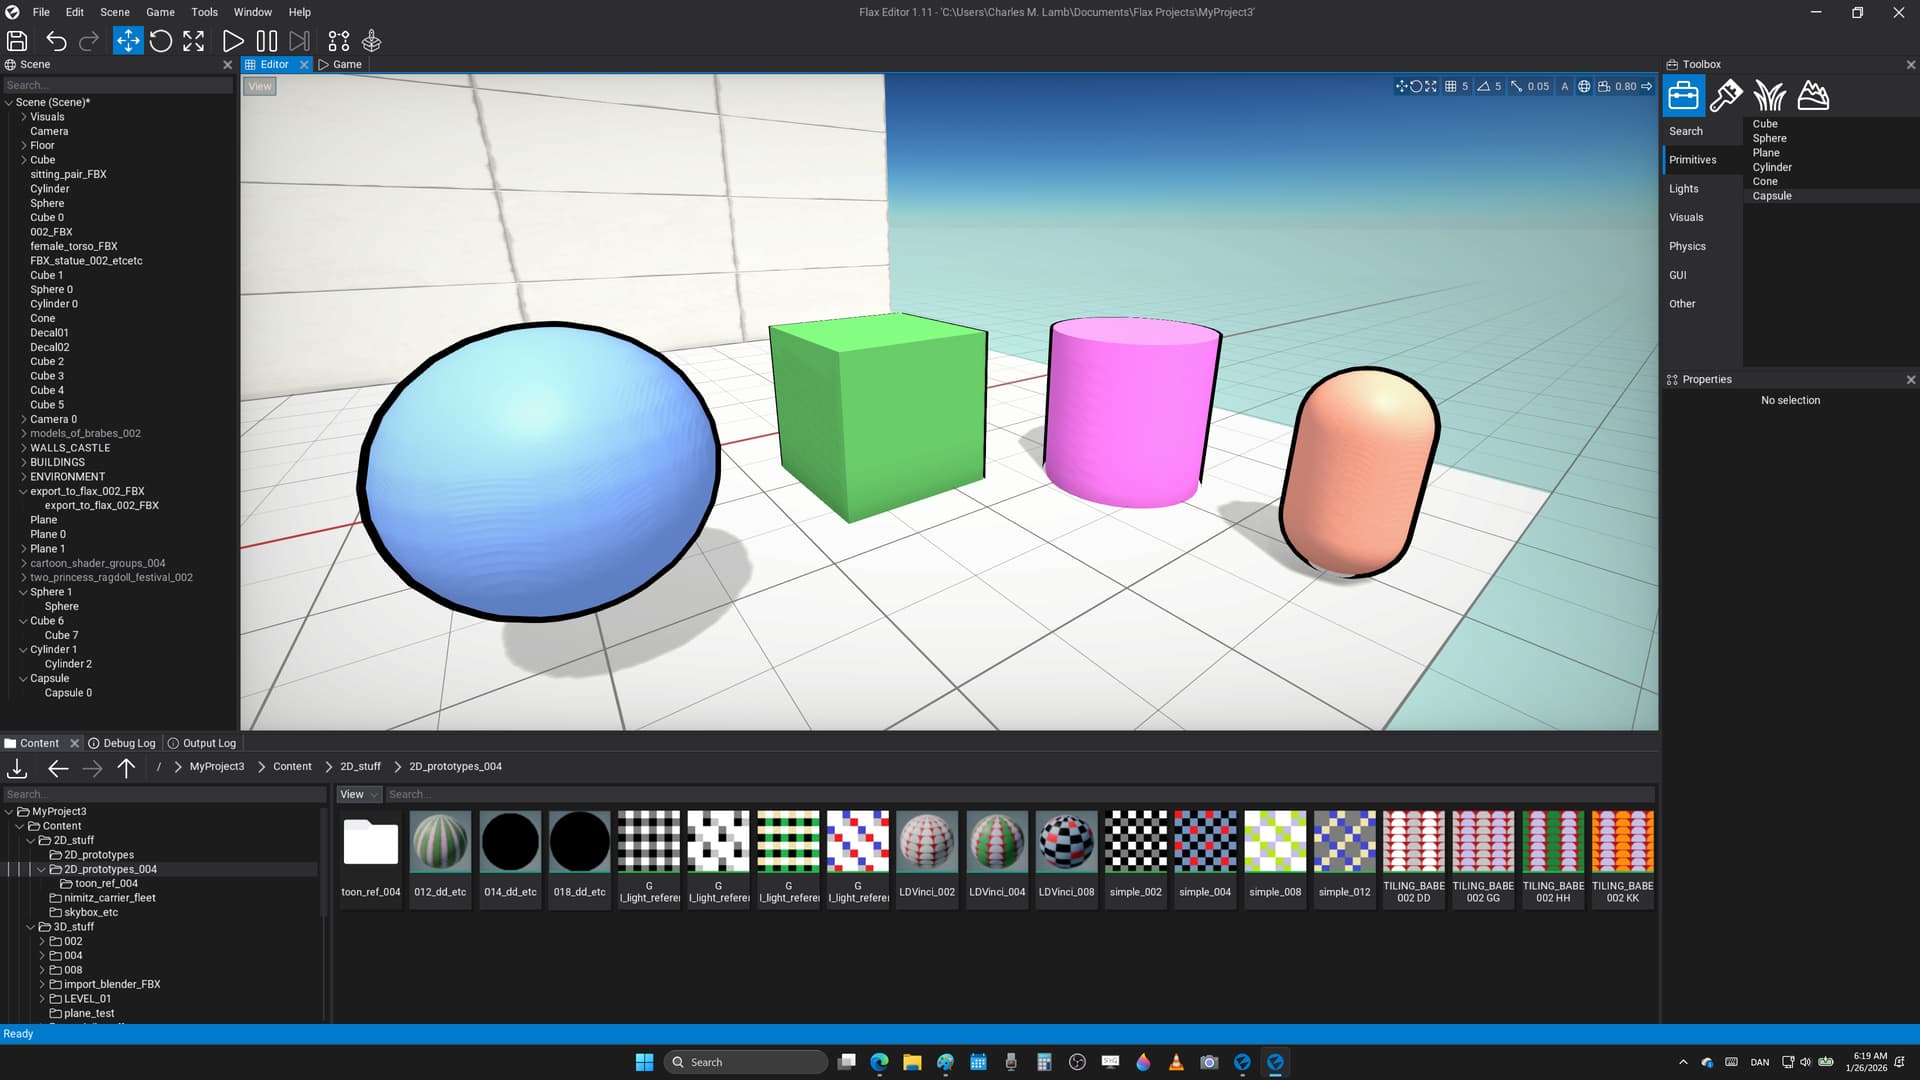
  3. after that it works directly in the 3D world of Flax Engine, and doesn’t need custom lighting, or sort of looks nice with almost no effort

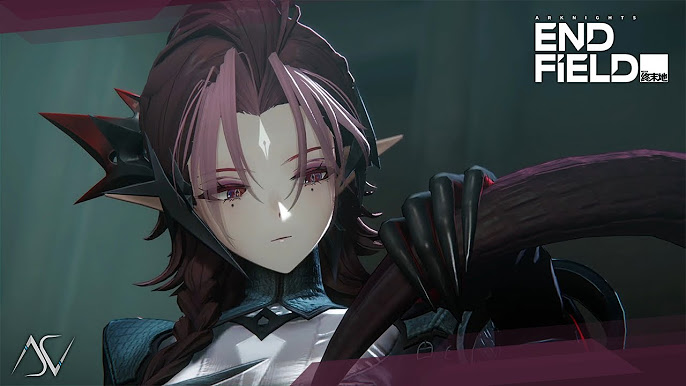
  4. to get hair to look really nice for these kinds of cel - shaded toon results is beyond me, and that must refer to other tutorials, or that it has to do with specular lighting, and also how normal maps, or post proc is applied to the model

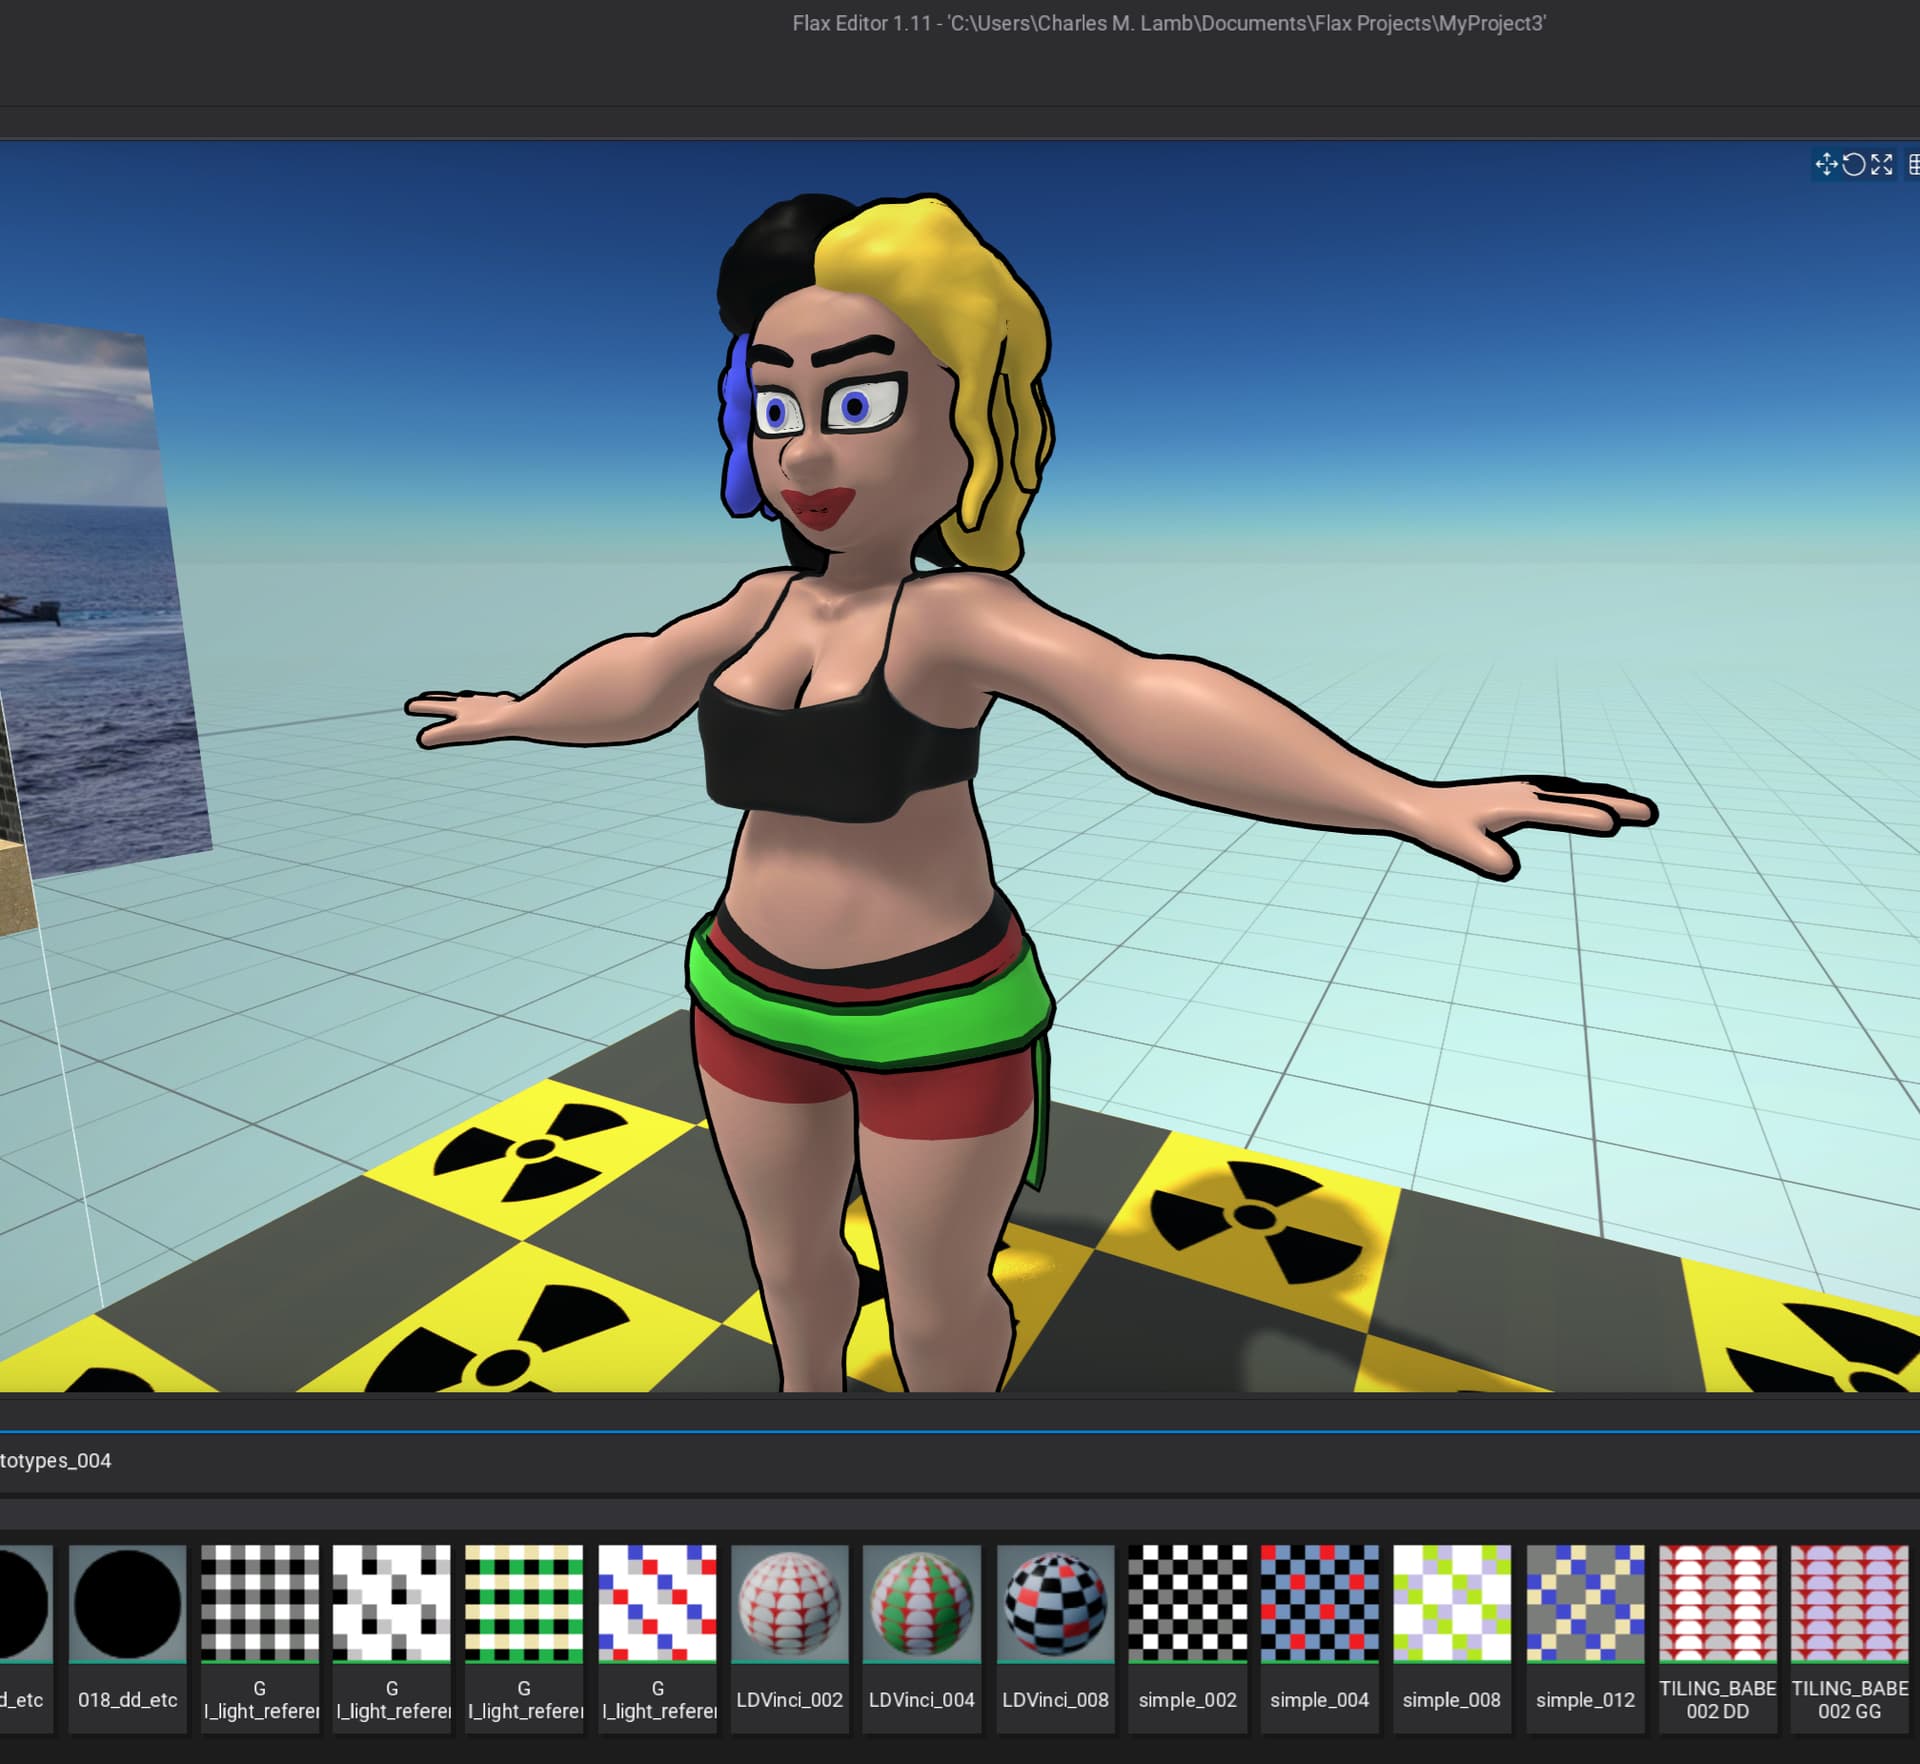
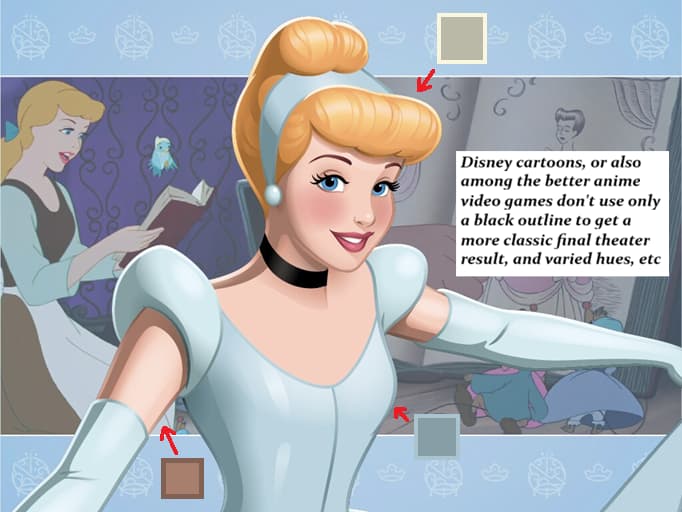
  5. this also works for animated models, or then that it’s relatively cheap depending on how many polygons are in the 3D meshes, and last that it’s rather easy to implement for beginners, or then that it’s somehow not that different from what the Disney corporation uses in it’s animations, etc

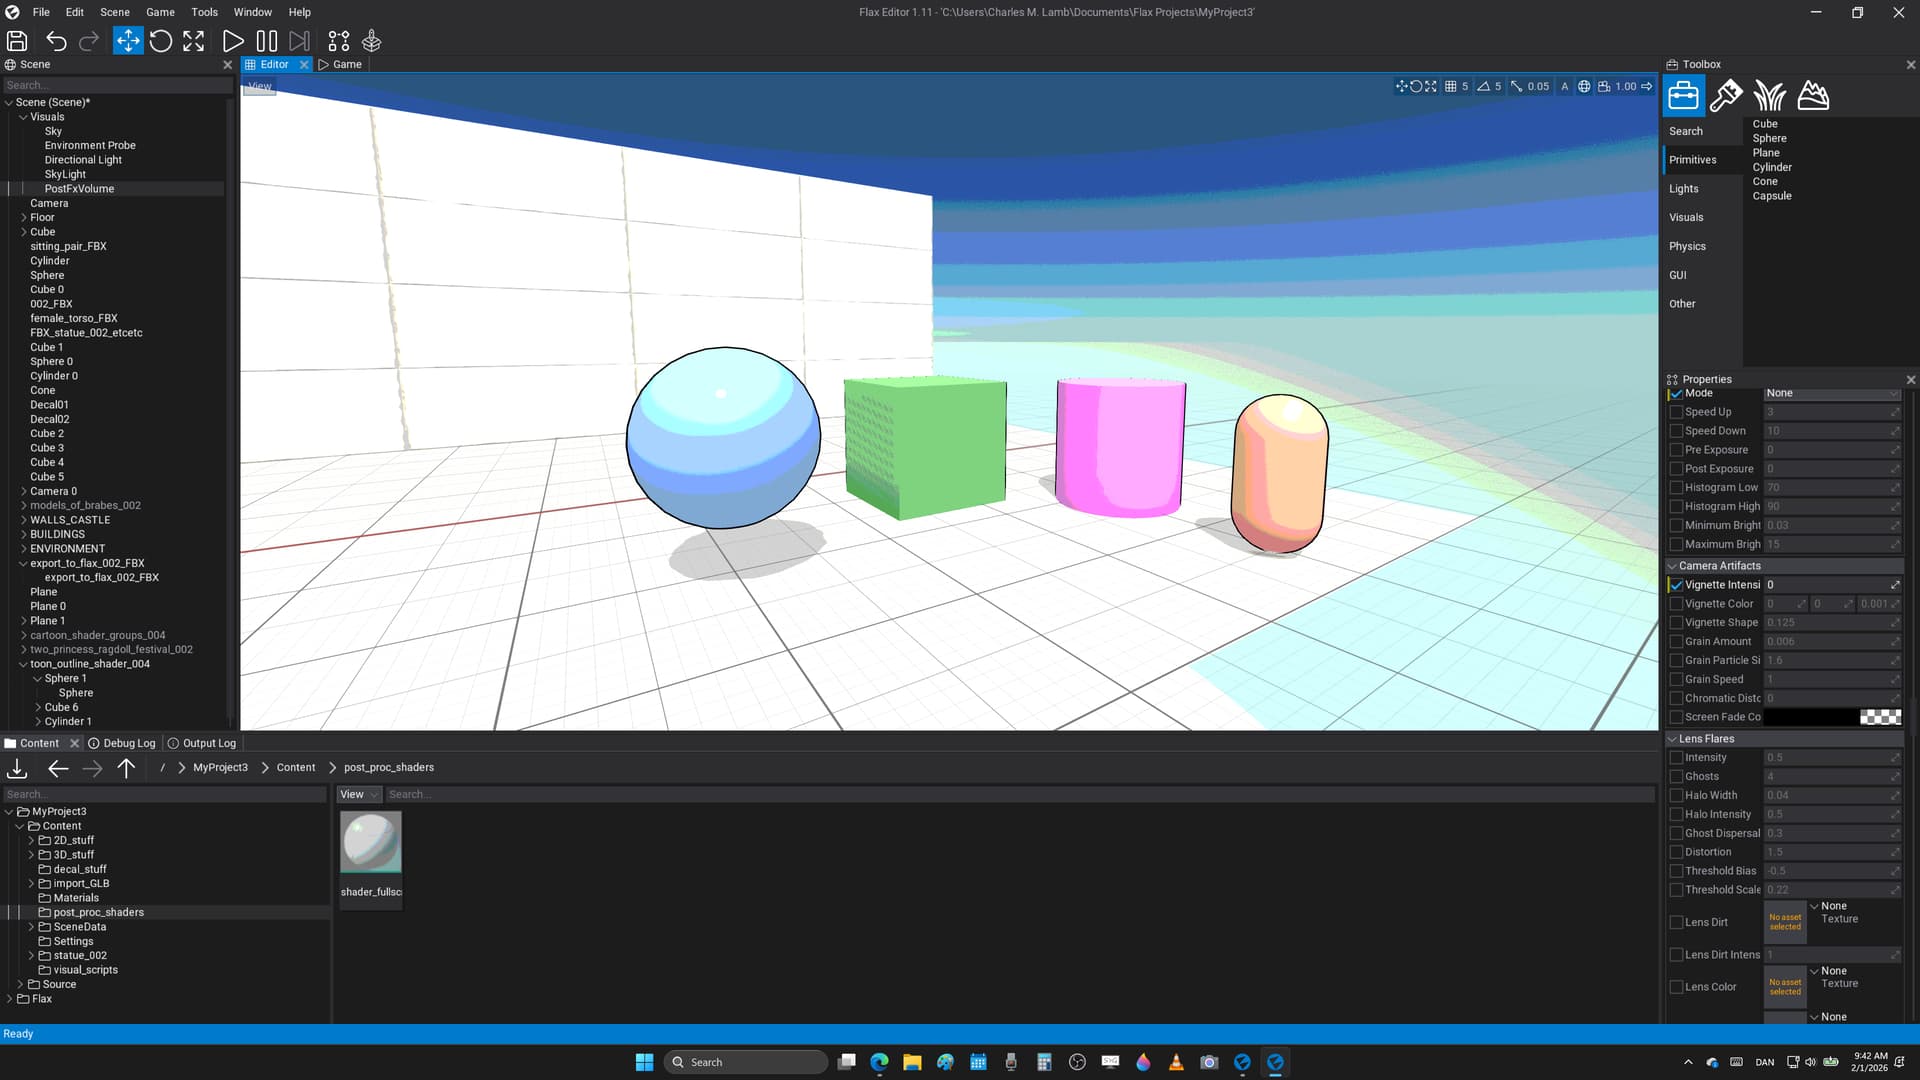
here’s an example of the effect, and that for low - poly models it’s rather fast

STEP 1 :

this is something that learned from the Godot Engine 3 - series that had both ’ next pass - materials ', and then a setting called ’ grow ’ that let’s one add to the size of the existing mesh in the direction of the normals, or that sort of pushes all the vertices a bit from the surface of the 3D object making it a bit bigger in every direction

image

Flax Engine doesn’t have ’ next pass - materials ’ that effectively just renders the same mesh twice, and so one has to ’ hack ’ that a bit to get the same effect, or here’s a simple example

  1. start by making a simple sphere

  2. then add another sphere of the exact same size as a child of the first one, or so they follow each other in 3D space, and scale, or rotate to the same values

  1. write this material shader that takes the ’ normal vector ’ for each 3D point on the mesh, and pushes it a little in that direction all over the mesh, or that also inverts the second object so it works like a shell around the character, and however doesn’t render on the front faces, or so the first mesh is still visible

  1. add that to the second sphere to get this result, or also set it to black color to get a classic cartoon outline, and then unshaded to avoid shadows, or reflections on the outline because of the engine graphics calculations, etc

note : to avoid lights, and shadows, or also effects changing the colors of the outline set the shading model to unlit for this material in the general settings in the material editor here

STEP 2 :

the next step is simply to paint the textures on the 3D model in a more cartoon style, or to get the last look, and sort of make sure everything makes sense in a cel - shaded world

STEP 3 :

notice that Disney characters, and for instance also in Arknight Endfield use different colors for the outlines, or not just pure black, and that to get a more pro look to everything that one could tweak the colors of different outlines on a composite 3D model, or to sort of ’ cut it up ’ in Blender so that it could have different colors, and several outline shaders

it’s a bit subtle, or however you could see the difference here

and here’s an all black outline that somehow is more harsh, and then perhaps could look a bit better, or sort of adds a bit of noise to esp. cartoon renders

A possible update to this - set the layer of the outline objects to something else, like 4 or 5.

In post fx shader, use Scene Texture → Object layers buffer == 4 for lerp
Basically bleed the color of the actual models but a bit darker onto the outlines

1 Like

think you’re saying to sort of ’ smooth certain objects ’ in post proc, or to make the effect even better, etc

is there any way you could show how to set this up, and that find it very difficult to make these post proc shaders that one sort of has to think in terms of the entire screen, or most shaders are very tough to make already, and not sure what you’re actually talking about here

note : there also was a user here called ’ Ari ’ from another thread that said he wanted to make a shader like from Arknight Endfield, and have been trying to see if could make that really good, or not sure these are acceptable references

copyImage

what not sure of is how they sort of use ’ brown shadows ’ on most of the skin surfaces, and if they somehow get that effect with sub surface scattering, or it’s as if most shadows are black as in the normal world, and then somehow the skin has a different color lighting for the shading, or then as if the skin is translucent from certain angles, and not sure how to recreate this very cool look

?!??

1 Like

Sorry, I did not clarify my idea back then.

Upon more research, the guys at blender use Fresnel shaders to simulate outlines for anime-style rendering

Gives a nice fade effect too

https://ameye.dev/notes/rendering-outlines/

1 Like

that was an amazing article, and think the ’ blur pass effects ’ look very cool, or think there are ways to make it look even nicer

from what could read the idea is first to get the silhouette, and then simply to blur that a bit so it grows in all directions from the size of the original mesh, or then add that back into the final render, and not sure this is a post proc - shader, or how one selects what objects should get the outline

not sure you said something there was a ’ scene texture ’ that tried connecting to a post proc - material, or that actually got something like the black, and white photo, or then somehow if blurred that it’d give at least a classic black edge around most objects, and that gonna have to try that when get back to my stationary PC

:smiley: :beer:

1 Like

here’s an update to add a cheap cel - shaded look as a post proc effect, or to apply quantization to the colors on a full screen level

it’s from this article, and reddit post on how to get started

it basically says this from another google AI prompt that tends to give rather nice basic answers

  1. multiply the colors by how many steps you want

  2. then either use ’ floor ', or ’ ceil ’ to force the colors into nearest whole number, etc

  3. then divide by the number of steps, or it sort of gives this look

not sure one could apply this for each model, and that gonna try and make that also from a few simple models later, or however this is a ’ full screen cartoon shader ', and that’s also quite useful for getting so - called ’ Quake graphics ', or not sure you remember the old DOS video games, and even from the Commodore 64 era that ruled at making things appear ultra retro

here’s the graph nodes that use, and to get this result in the awesome Flax Engine

note : had to disable the ’ vignette ’ after adding a PostFXVolume that somehow added a ’ curved lens ’ to the entire screen, and that made the shader look weird, etc

here are the current limitations of this method

  1. somehow when moving close there’s a jump in either the shadow quality, or then lighting cascade math that causes artifacts on the surface, and not sure where to turn those off, or adjust the quality of either of those settings to avoid that happening, etc

  2. then that the ’ black outline replica mesh ’ sadly exists in 3D space that makes it bend, and stretch because of the graphics being in perspective mode, or that it’s not a constant pixel width effect because of that, or there’s no real way of getting around that from what know, and then that this way of adding cartoon rendering works best if the 3D models one uses are optimized in other program to make the most of how the outline is added, or then last that it might be difficult to make run faster beyond a certain point from needing to draw every object twice on screen, and not sure it’s perhaps best for game jams, or more simple content because of that, and for now it’s more a prototype system

  3. when getting close the bands from the ’ floor band calculations ’ are sort of blurry because the image on screen it starts from doesn’t have the most sharp lighting graphics, or that it looks rather ’ unsharp ’ when moving up close, and that sum total the effects works best from moderate camera distance

:sunglasses: :heart:

note : here’s a video that goes into how to build 3D meshes in Blender that are put together for cel shaded - video games, or that one has to tweak things like ’ normals ’ in other programs, and sort of be rather careful how the polygons are placed, or to separate the final objects into several pieces to get outline inside the character mesh

also that it’s useful to split things like the eye lashes, or hair into several different meshes, and to give them a separate material that’s both 100 % black, or then gets ’ unlit shading ’ to add the final look, and think this is how they got a really good result in Arknight Endfield, or at least in PS2 - PS3 cartoon video games

not sure it makes sense to explain this, or however the amount of polygons in a 3D model matters very much to get a nice result with this ’ double rendered background system ', and for instance here are two low - poly meshes from Blender where it’s quite obvious there are errors, or the result is sort of degraded over what one could wish

  1. the red monkey is in ’ flat shading ’ that’s an export setting in 3D modelling programs that causes the outline to not be connected, and it’s important to use ’ smooth shading ’ to avoid this bugs

  2. after that the green monkey is rather low poly, or it doesn’t quite get the effect right near the eye brows from certain angles, and somehow this method of adding a cartoon line art to polygon objects depend on there being quite a few 3D points, or also them being placed rather well in other programs

here is the same shader duplication with a ton more polygons for getting the best appeal where it’s something of an effort to make this look good despite it all, and it has more to do with how one works in zBrush, or Blender to create the best results

what wanted to do was post a last trailer to show what kind of effects one could get, or that this shader is ’ production ready ’ for making video games like this, and that could also look very cool in the awesome Flax Engine, etc

you could also take it much further, and to add cross hatching shadows, or sort of a very stylized world also

enjoy, and feel free to post screenshots, or very cool WIP you could think of also

here’s my final cartoon shader, and that had to add the ’ tv - grain ’ effects from Flax Engine, or that now have something like Commodore 64 retro systems running live on a modern PC with nVidia 3070 RTX to not miss a single frame, and to avoid lag during critical game play moments

this is my ultimate electronics system ever, or that video games never looked better to also have ’ chromatic aberration ', and an ultra cool vignette from old school - monitors that look very pro

want to use this for game jams where go for therapy, or then have a few really good friends there to even get started, and that all these good things are happening because of Flax Engine, or that wanted to say #thx for all this wonderful programs

:smiley: :beers:

note : tribute to the Commodore 64 system where all the good stuff went down to be the first classics, or everything just rocked, and still wish it’d have taken over the world instead of SEGA Mega Drive that most people prob. see as the champion, etc