Follow these steps to create modular characters in flax game engine. For this tutorial I will be using "Adjustable Mannequin v1.2 " model from the blender market. For more information about this blender model. You can watch this video https://www.youtube.com/watch?v=B2xJCZHdae4&list=WL&index=6 to see how the model works. Vertex Arcade is the creator of the model. Feel free to let me know how I can improve this workflow. Any feedback is welcomed. Also this tutorial is just a quick way to get modular characters to work in the engine. I recommend learning more from the documentation because this tutorial does not go in depth when it comes to how the engine is doing this. Here is a link to the documentation of the engine Flax Engine Documentation | Flax Documentation. Also, I am a new user so I cannot provide many screen shots or links. Alright lets get started 
Step 1. Separate your model into different parts using whatever modeling software you are using.
Step 2. Make sure all of your models separated parts are selected and export from whatever 3D modeling software you are using. I recommend exporting your model as a FBX file.
Step 3. If you did not already rig your model, I recommend using AccuRIG or Mixamo, both are free to use and both have free animations that work with the rigs to get you started.
Step 4. Export your rigged model as FBX again if you decided to use AccuRIG or Mixamo or any other software.
Step 5. Because we are creating a modular character. You probably want to repeat steps 1-4 so you can have another rigged model to import into the engine with the same skeleton, same number of body parts that are separated in the same way, but looks different.
Step 6. Load into your flax project and drag in your rigged models inside of the “Content” folder. I recommend creating folders to keep everything organized like this. " Content / Models / Skinned / (drag your models here) .
Step 7. Before you fully import your model, you will see the flax “import files settings” window pop up. For the model type select “Skinned Model”, and under the “Splitting” selection check “Split Objects” and press import. You will now see that the model was imported and split into different parts. All of these parts are rigged with the same skeleton.
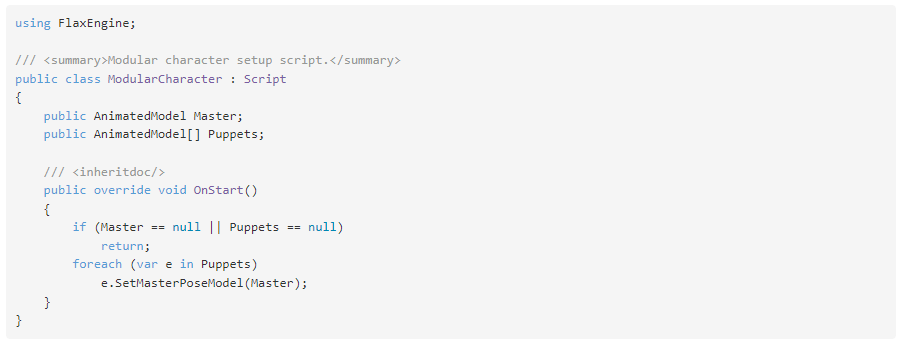
Step 8. Inside of “Source/Game” you want to create a script. You can create your script by right clicking in the folder in the game engine and then going to “new / c# script”. The script below is from the official flax engine documentation under “Manual / Animation / Animated Model”. Flax game engine recommends using “Visual Studio Code” and having the “Flax Engine Tools for Visual Studio” installed.
The script
Step 9. Once the script is created, right click inside of the scene container on the left and add a model by going to “new / model”
Step 10. The model that we just added to the scene will keep every skinned model from getting separated. Next make sure your new model is selected in the scene and click “add script” and from there you will see the script you just created. You can also drag and drop the script from “Source / Game” into the “Scripts” section if you like as well.
Step 11. Now that you’ve added the script to the model in the scene, you need to add all parts from 1
complete model as children of the model that has the script. So for example, lets say I imported 2 models into flax. Model 1 and model 2. Both of these models have separate parts and when you put all the parts together, it completes the model. So for example, model 1 has head1, body1, arms1, and legs1. Model 2 has head2, body2, arms2, and legs2. We only need head1, body1, arms1, and legs1, to be children of the model that we added our script to. To see an example go to the the documentation and go to “Manual / Animation / Animated Model” and on that page if you scroll down to Modular characters, you will see a gif that has a model named “Modular Character” and all the children that it has. We are doing the same thing here. To keep all of the skinned models together in the scene while dragging it to another area of the scene, select the parent of the skinned models which is the model that has the script and then you can drag that model where you want. Dragging that model where you want will take all the skinned models with it. Selecting a skinned model alone and dragging that will separate it from the other skinned model parts.
Step 12. Make sure the model with the script is selected again in the scene container on the left and under the name of your script. Make sure that you select any child as the master. I selected my models head as the master.
Step 13. I have 3 body parts left that are not assigned to anything so I just need to increase the size of the puppets to match that number and then select the rest of the body parts (skinned models) as puppets. So for example, in my Master slot I have “Head1” as the master skinned model. For me, I have 3 skinned models left that are children of the model with the script. Those skinned models are “Body1”, “Arms1”, and “Legs1”. Because of this, I need to increase the size of the puppets to 3 and assign those body parts to the elements.
Step 14. Now you have your first modular character. To swipe out parts, all you have to do is click on a body part (skinned model) in the scene container on the left, and then in the “Skinned Model” field, click the down arrow and you can select the other body parts that you imported into flax.
Step 15. If you have an animation ready to use that works with your skeleton, all you have to do is simply add the animation to the master body part. So for me, my models master body part is “Head1” so I just have to select “Head1” and for “Animation Graph” select the animation and the other body parts will follow. When you press play, you will see that the animation is playing for your modular character. To learn about animation in the engine, go to the documentation, then go to “Manual” and click “Animation”.
If I missed anything just let me know, I could not add pictures or more links because this is my first post here.
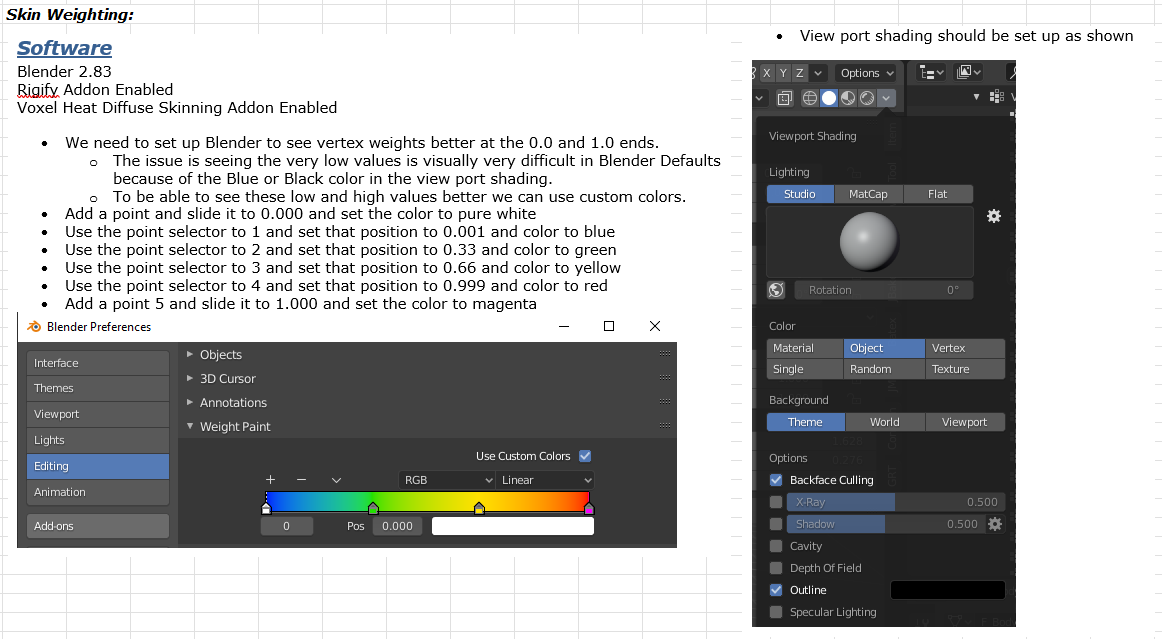
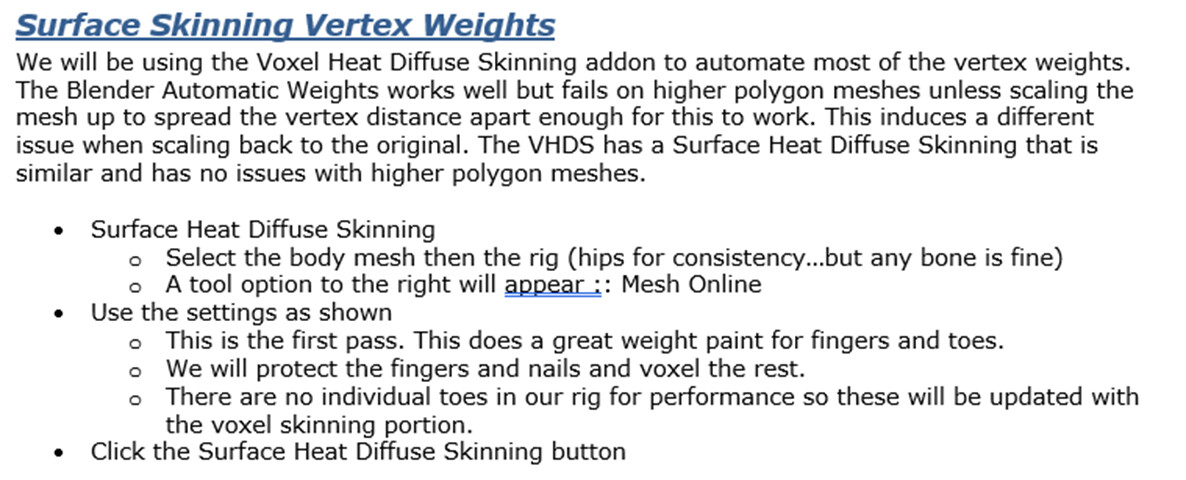
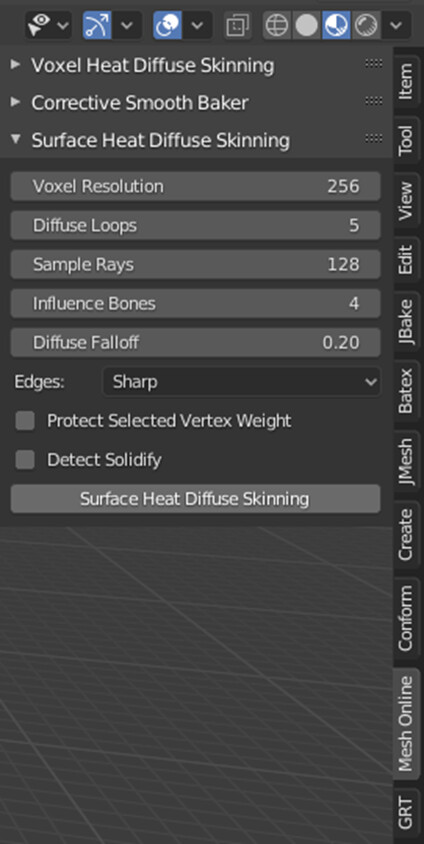
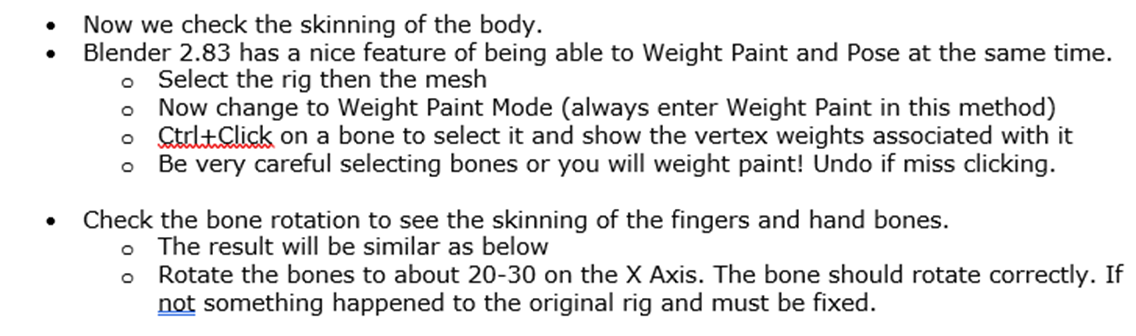
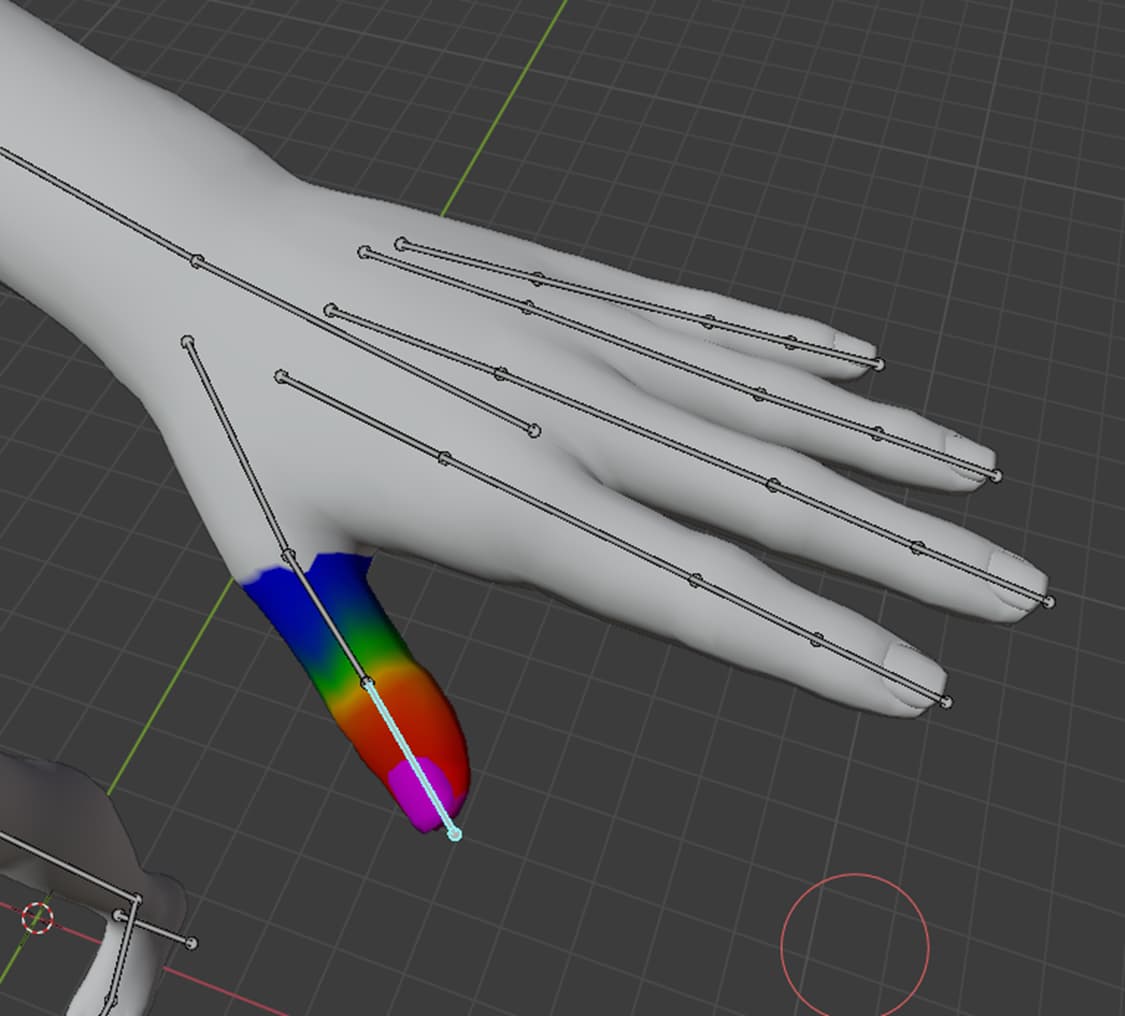
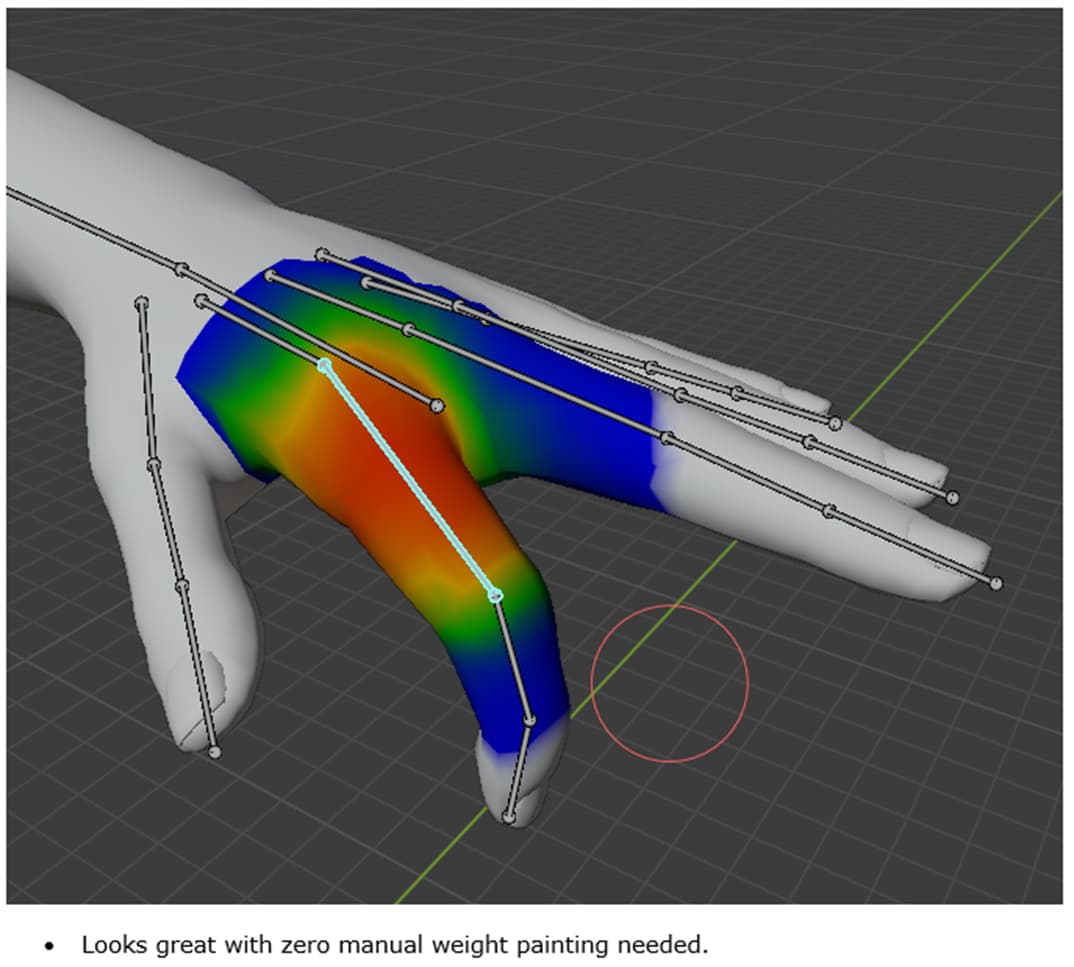
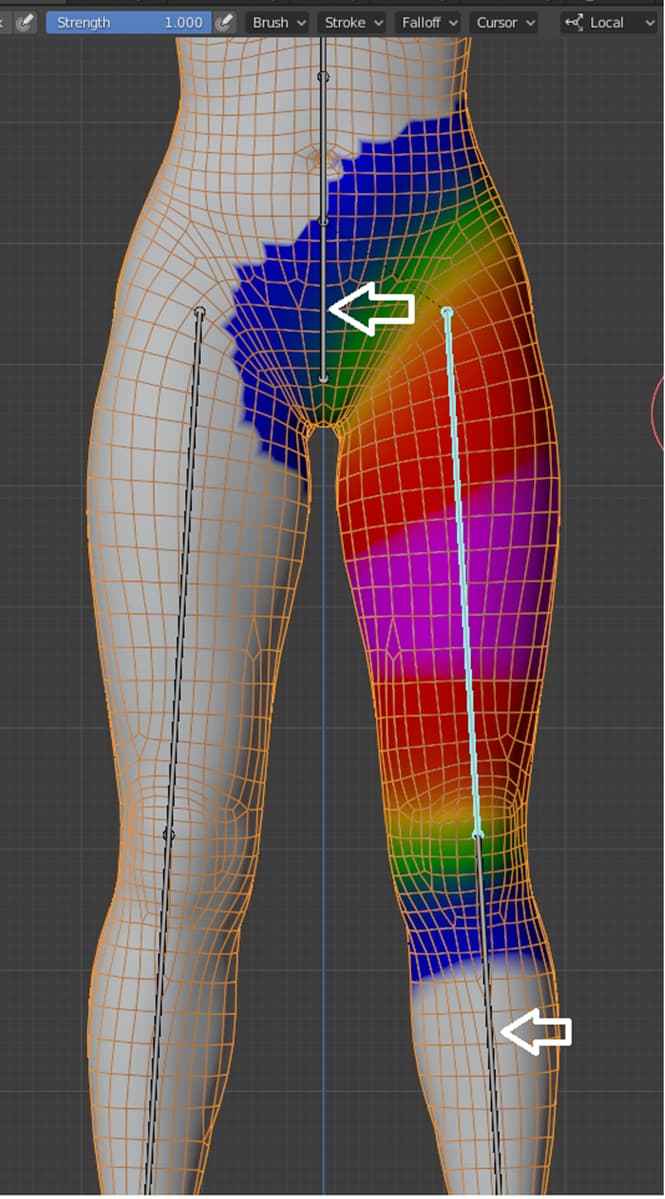
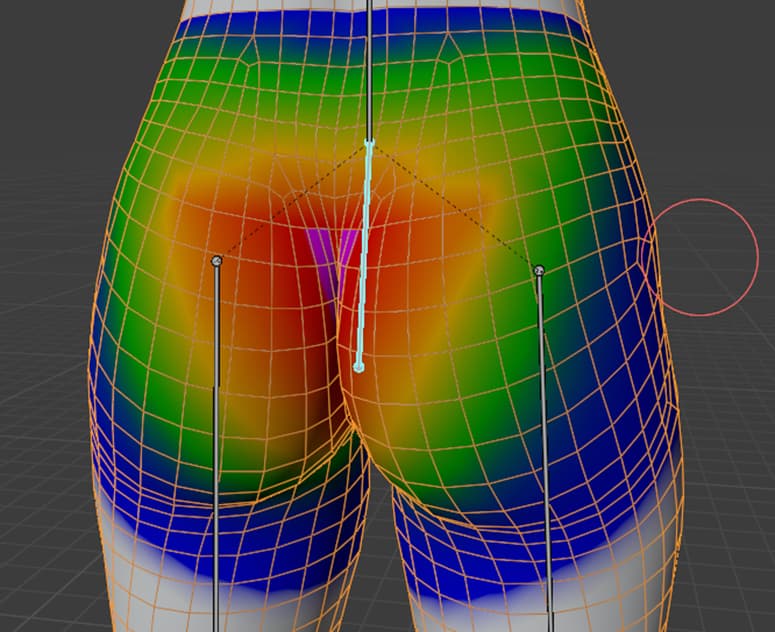
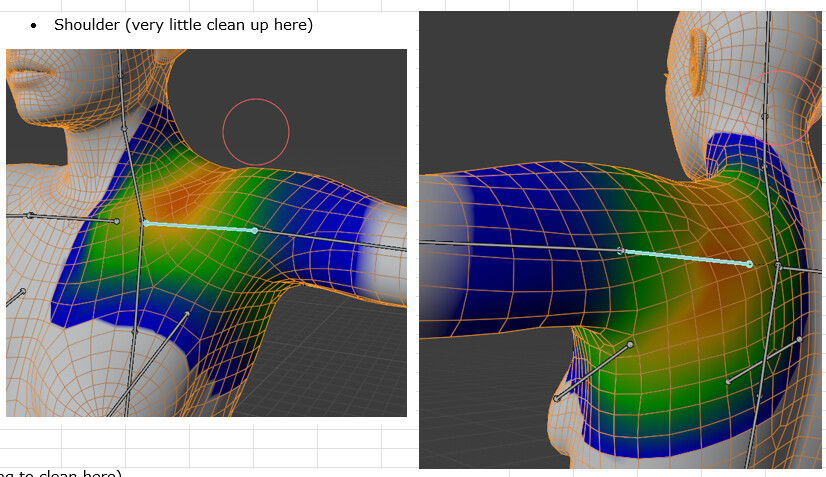
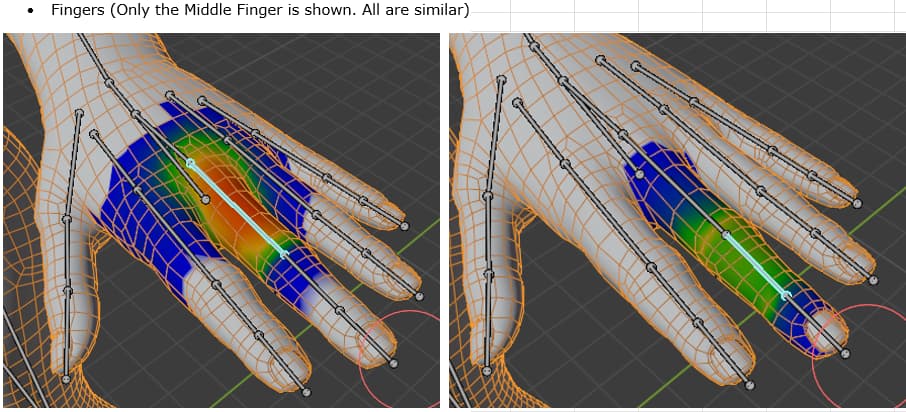
 ) on the character skeleton. It helps to have 1 female and 1 male with the bone naming the same/similar to a ‘Standard Mocap Rig’. The only real difference between them are the dimensions of the breast bones and the larger scale of the male. These are FK rigs but work extremely well within game engines. To clarify slightly here since this animation thing took me forever to wrap my head around. Also some tips/advice on best skinning method for modular characters (or even Uni-body). This method drastically reduces weight painting as well as gives excellent skinning results.